Shudder. Shutters.

In varying condition, the original shutters that adorned the front and dining room side of the house were removed prior to painting. As with the restoration of the Butler’s Pantry doors, our painter’s response to the question of stripping and painting them was, “It would be less expensive to replace them.”

Out of the question. If we have learned one thing in this process, it’s do your research. Builders, painters, and the local hardware store will always tell you to replace your windows, buy new shutters or get new doors and hardware. For a number of reasons house components 100 years ago are (almost) always better made than even the highest quality items purchased today). This includes wood siding, windows, doors, hardware and so much more. I will spare you the details in this post, but please reach out if you’d like to learn more.

Thanks to The Craftsman Blog, The Old House Guy Blog, and a number of other online resources, I learned a safe way to strip the numerous layers of paint and return the shutters to a condition where they can be painted and rehung.

Progress so far:

Next: The outcome!

The (im)perfect pair. 

Now, standing in the finished space the process seemed simple. In truth there were numerous iterations to determine the ideal state. Anything is possible with an unlimited budget and a clean slate. Modifying an existing space with modern amenities without creating the feel of the “new” part of the house is borderline miraculous.

Siburtek and Limekiln Studios are a husband and wife team who themselves own an older home. They understood and appreciated the 1920’s attributes and worked with great care and expertise to maintain the character and quirkiness while creating a functional and beautiful space.

And they were patient. Very patient. I like the details and wanted input on all decisions.  The result- a paired laundry space and mudroom in a creative and highly functional way. On budget. It is a miracle!

Every last detail & resources:

img_0073

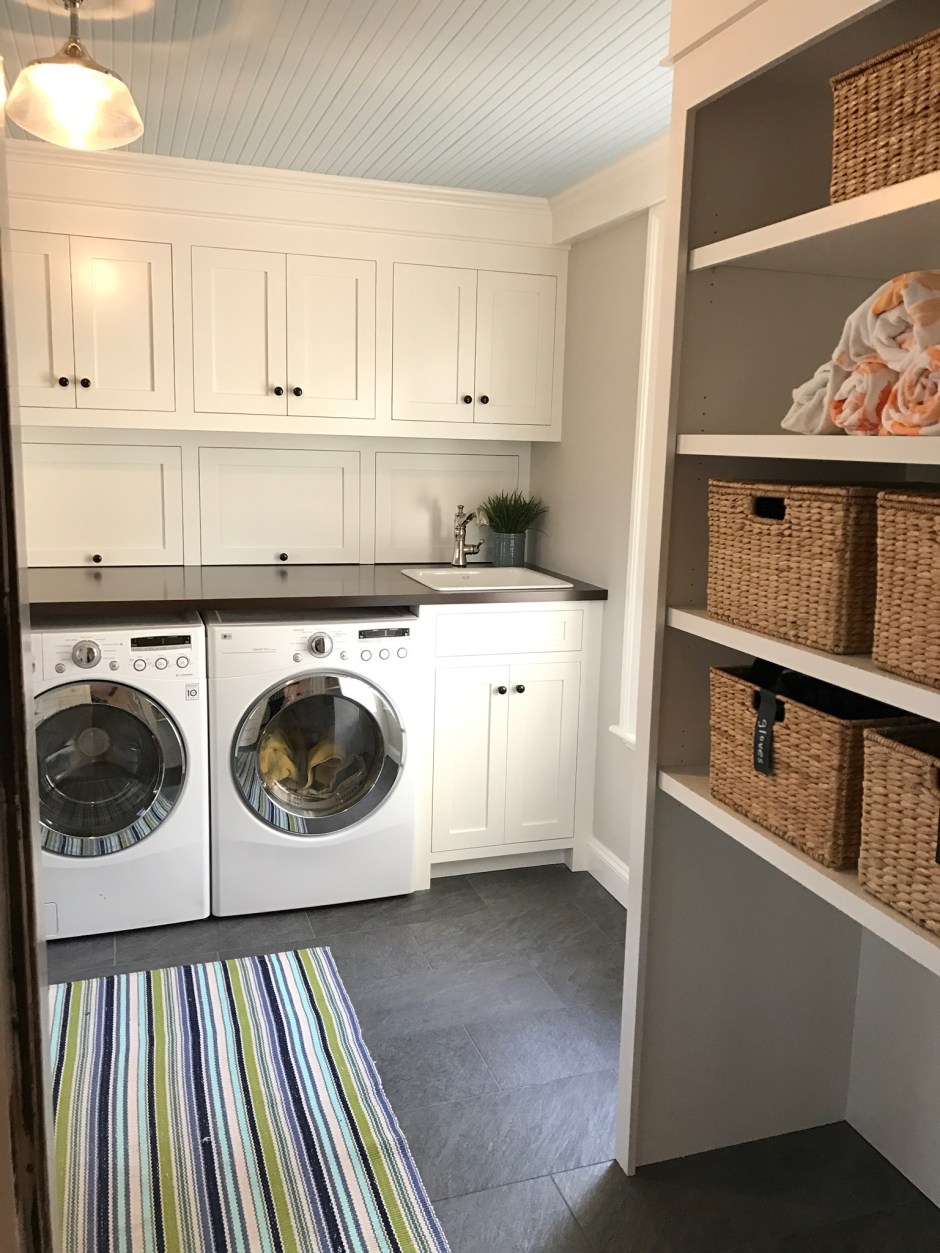
Inset cabinets to mimic those in the Butler’s Pantry.  Porcelain knobs from Rejuvenation are period relevant and the right scale.  This Kohler porcelain sink and faucet with pull out spout is both beautiful and functional.  Laundry stains and dirty hands beware!

The countertops are wood finished in a walnut stain.  The school house pendant (another period reproduction) is from Capital lighting– the look we wanted at a very reasonable price!

All the paint is Benjamin Moore:  cabinets are White Dove, ceiling is Polar Ice and walls Rodeo.

img_0064

Radiant heat was added to the floor- dreamy on a snowy day.

To maintain the feel of an enclosed porch we chose incredibly durable Italian porcelain tile that looks like slate, but won’t stain with the dirt and salt the troops track in.  Another budget friendly choice.

img_0068

A bench with lots of room underneath for shoes, boots and whatever else gets dropped here.  Pillows were made from Serena and Lily shower curtains.  Yes you read that correctly- canvas shower curtain material is durable and significantly less expensive than fabric by the yard.  Plus no stress if they get stained or damaged!

img_0079

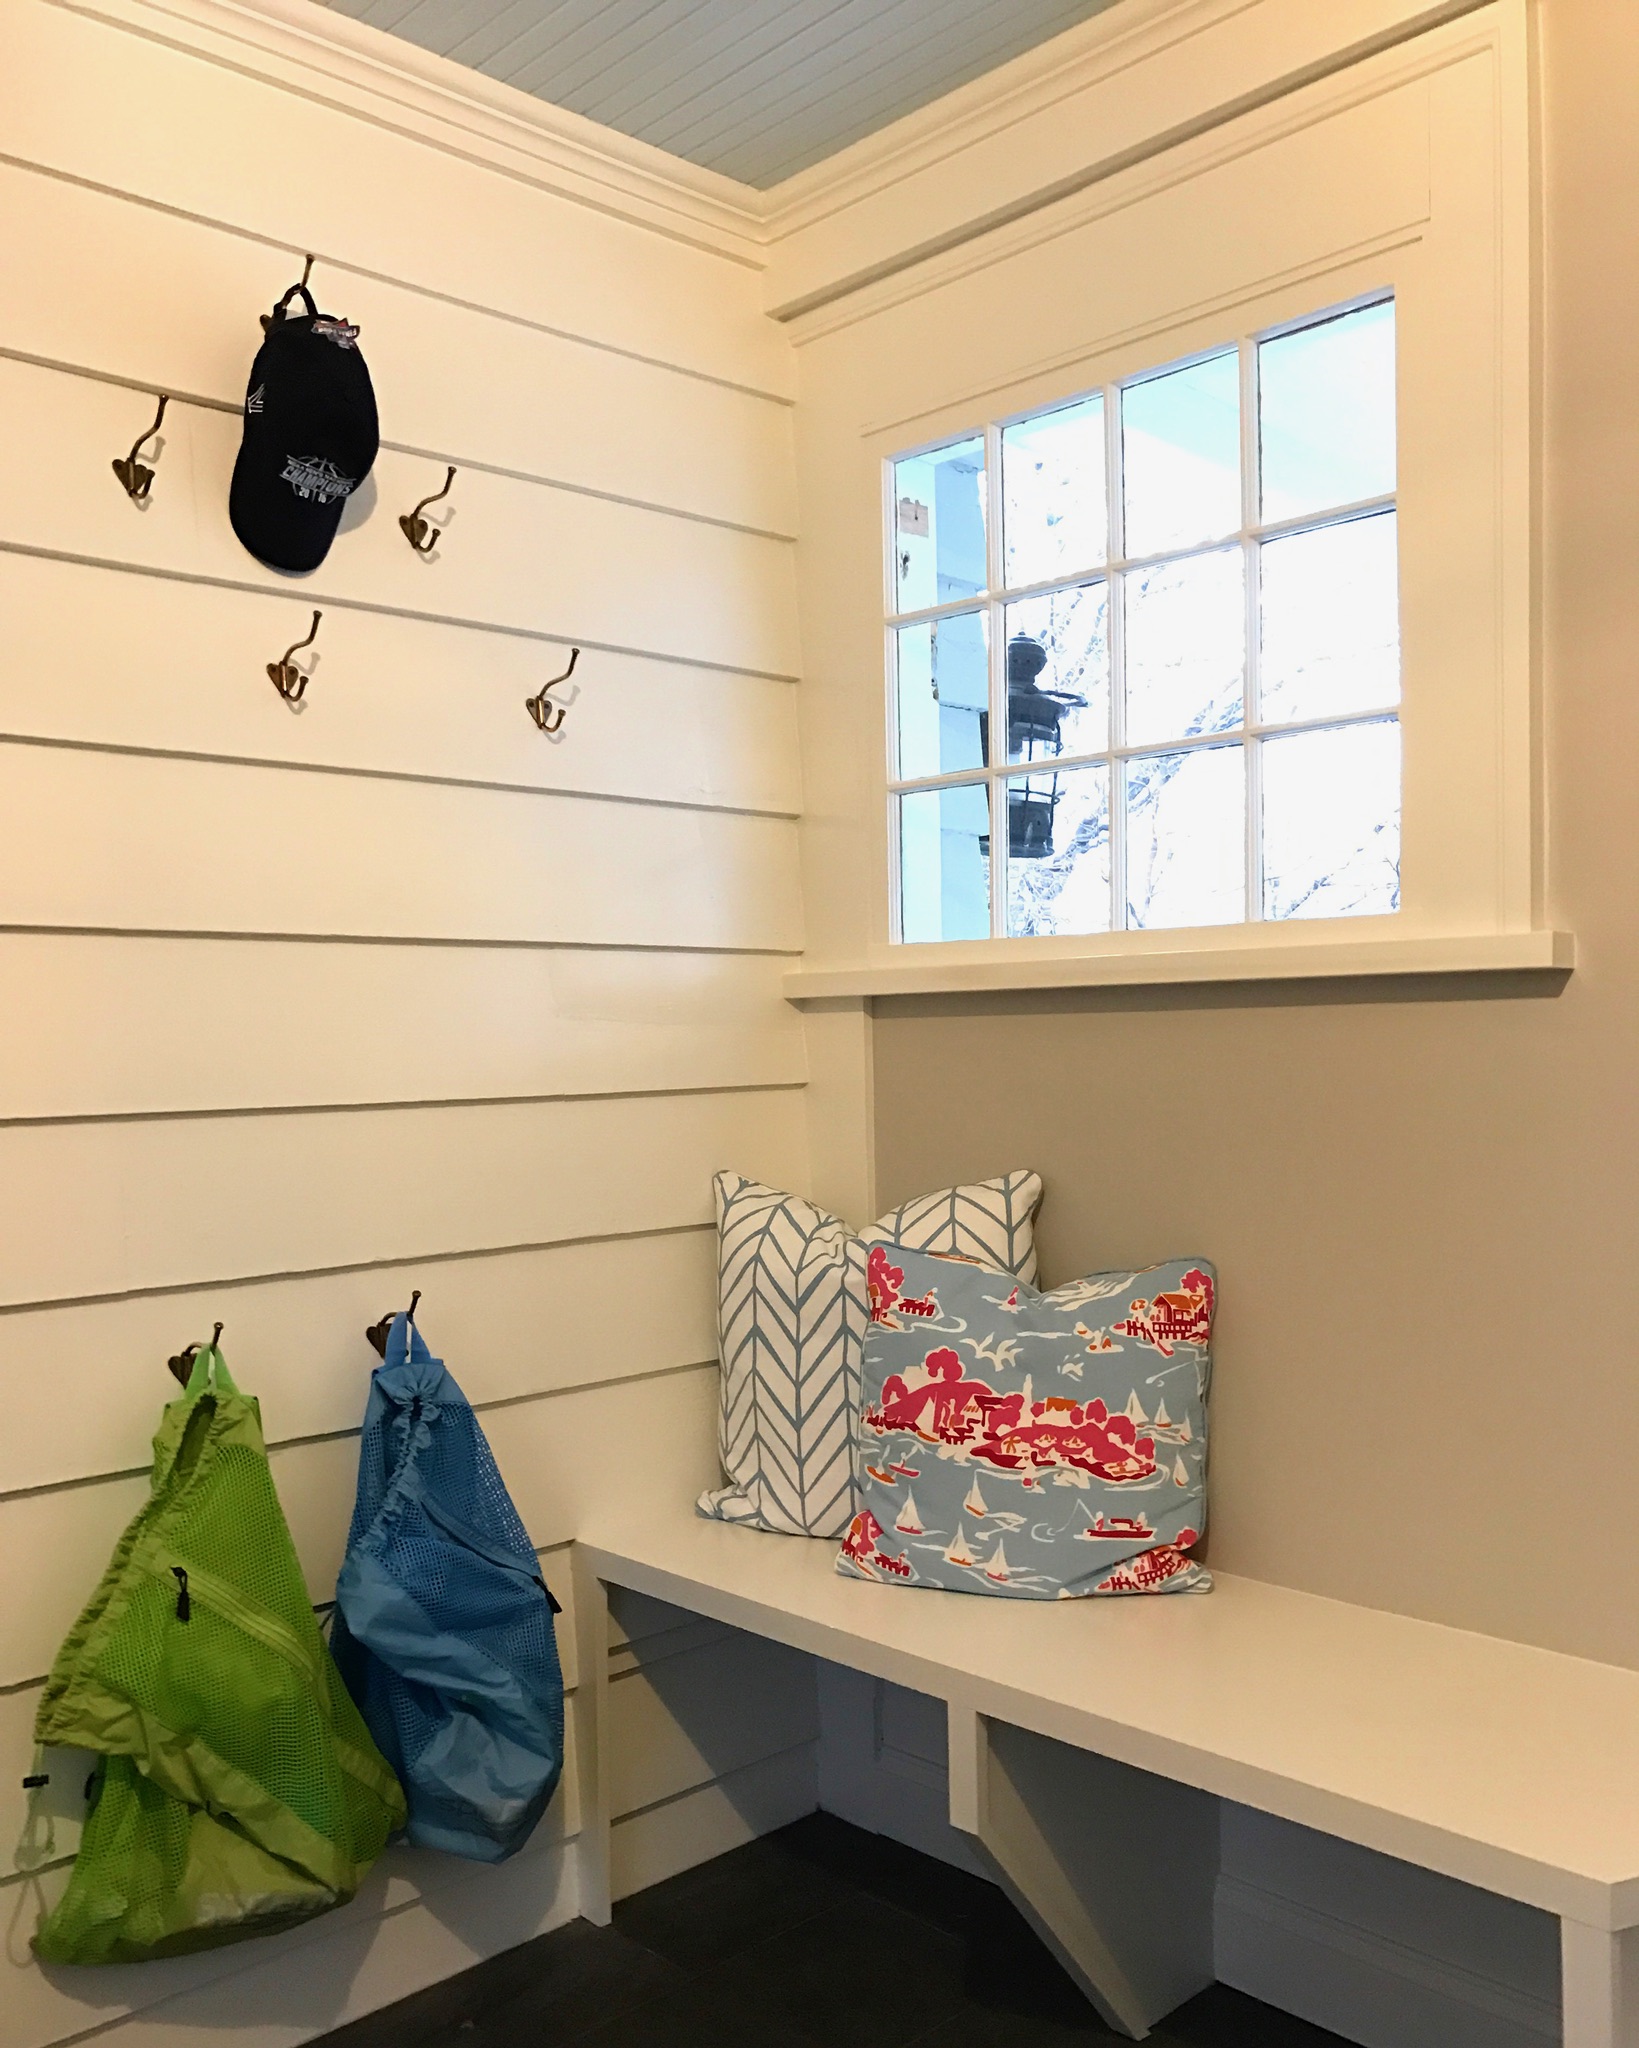
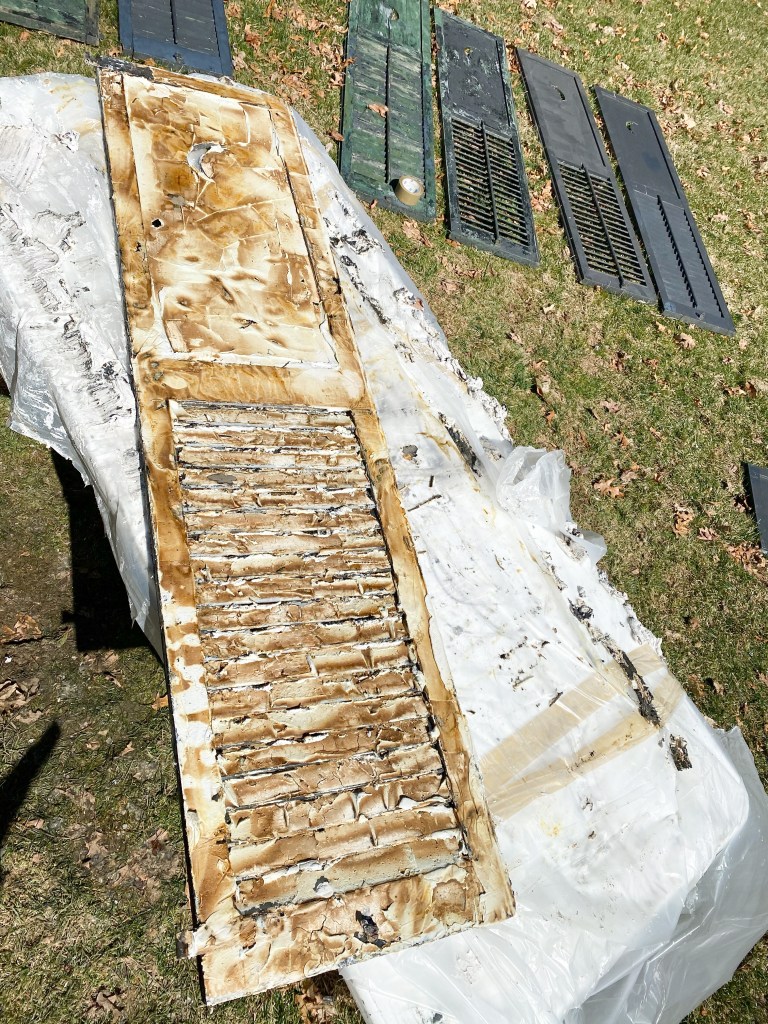
We left the original siding (remember this was once a porch) to maintain the authenticity and story of the house, then added lots (and lots) of hooks for hats, jacket and bags.  Found these vintage 1920’s heart hooks on Etsy.

img_0071

Last but certainly not least shelves for everything we need from hats and gloves to beach towels!  The open space below- room for the piece de resistance and splurge- a 1920’s reproduction laundry cart!  On it’s way from Rejuvenation this gem will revolutionize the laundry process (or atleast keep the dirty clothes from being dumped on the floor).  Told you this was imperfect!
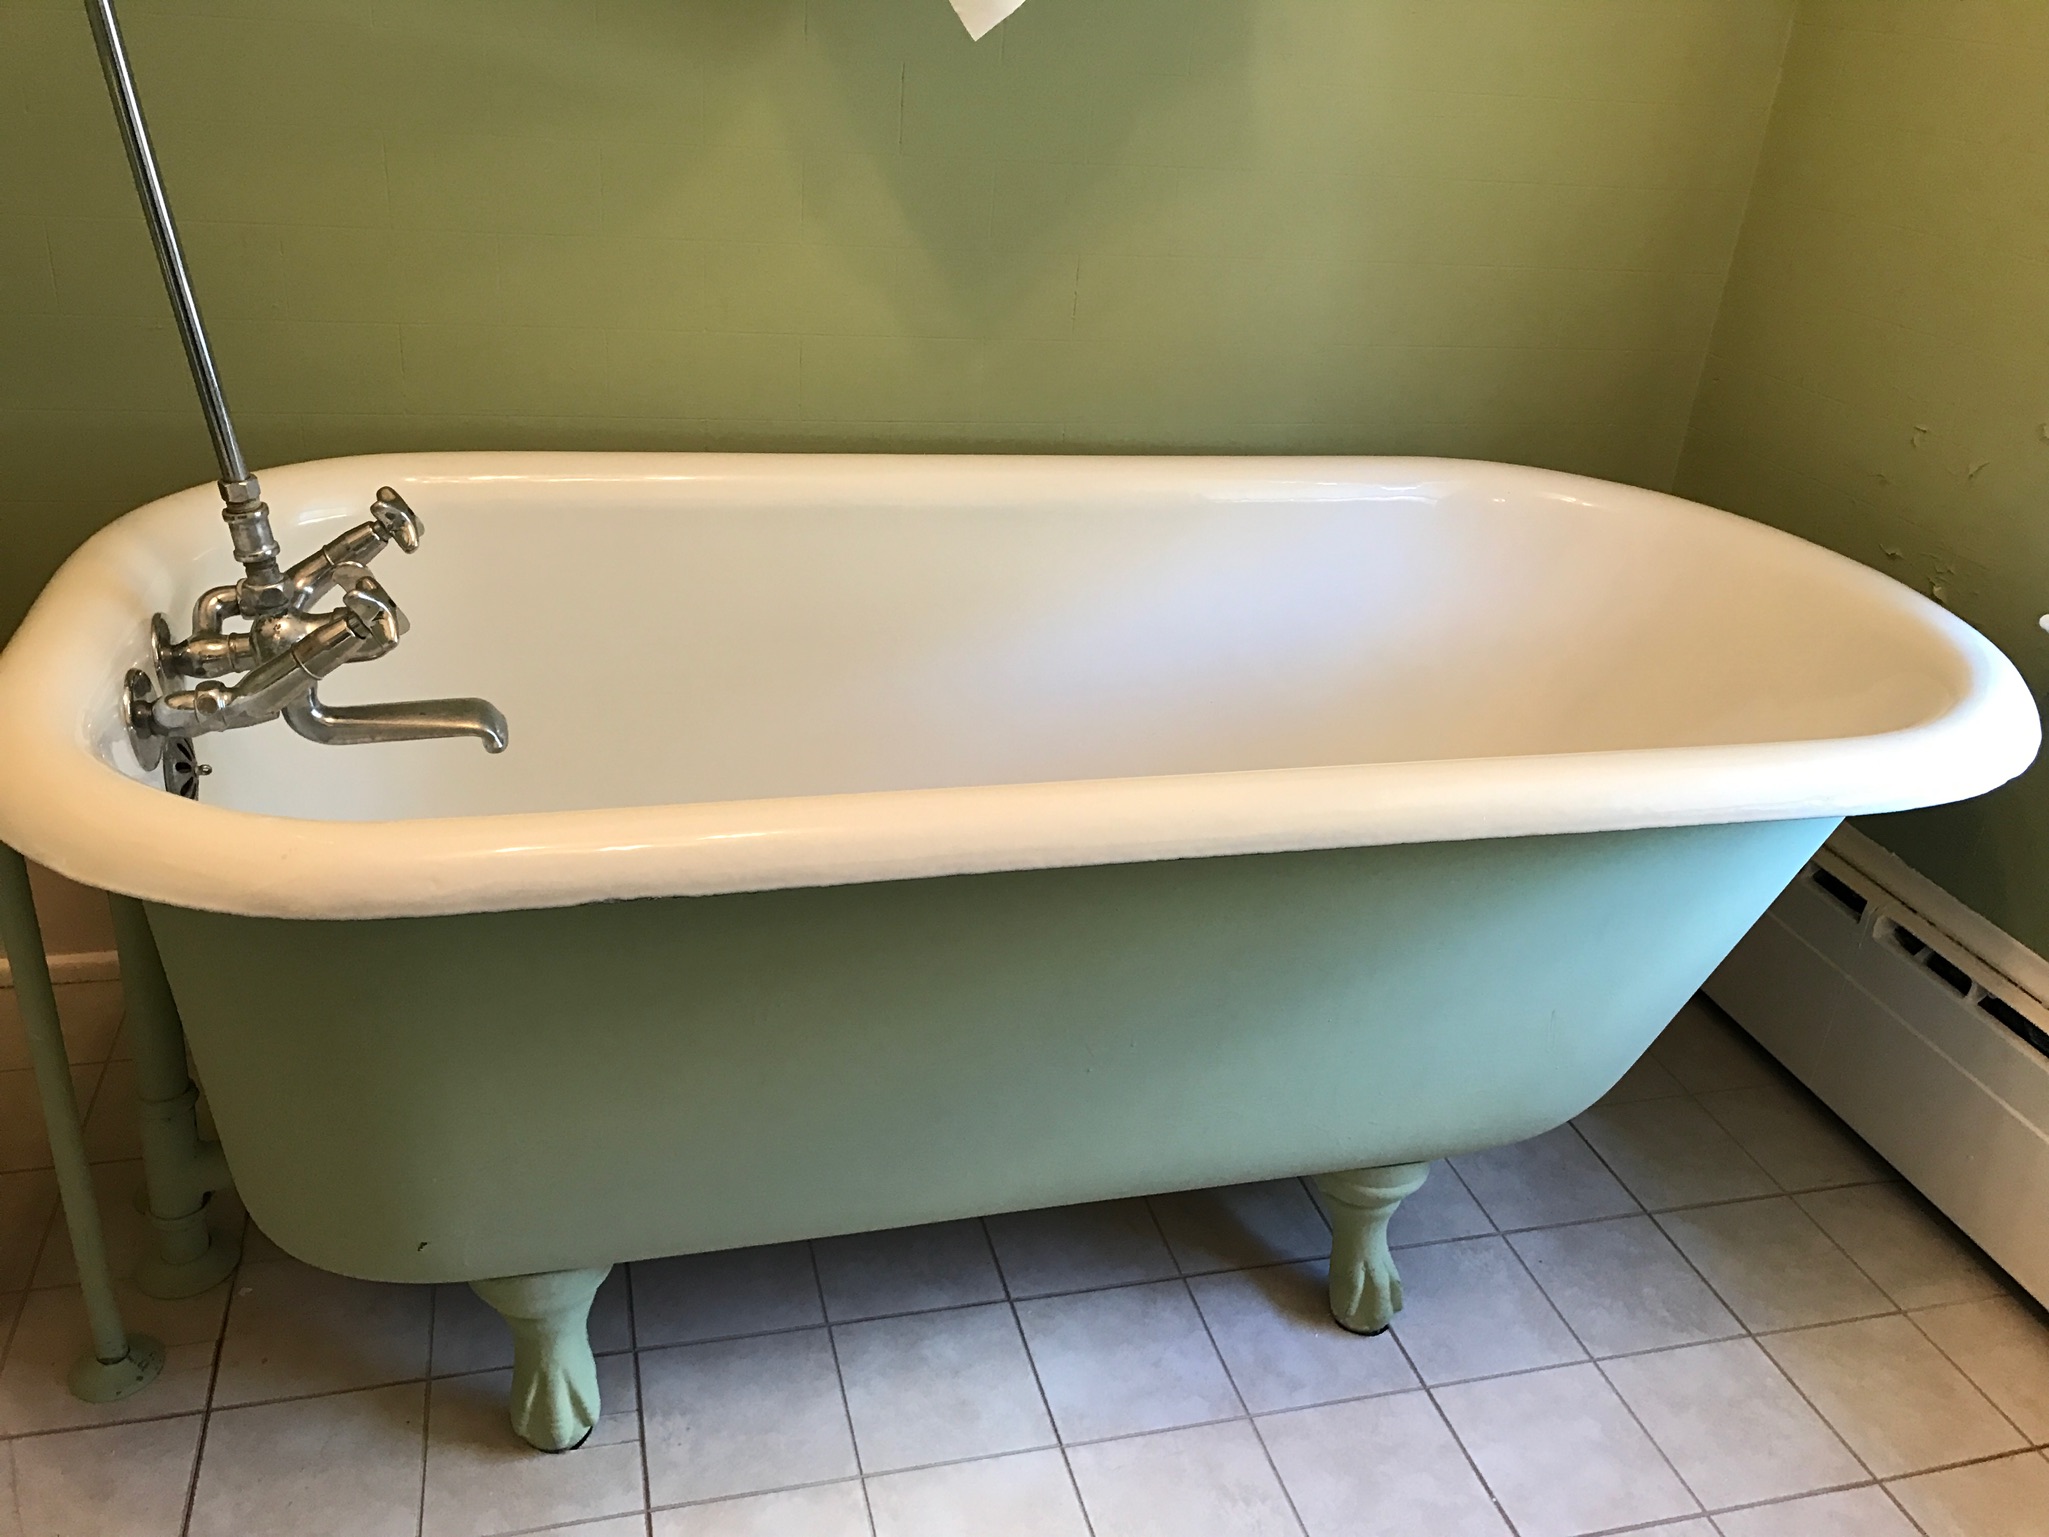
Next: a discovery. 

Simply original. 

The beauty of a home with few renovations over the years- in tact original details.  As we move down our project list, we continue to find many well preserved 1920’s elements and hints of facets removed over the years.

Here are a few of my favorites:

The home was built with two full bathrooms. One on the second floor the other on the third.

Both bathrooms include the original medicine cabinets.


One of two original clawfoot tubs is still in place (the other was removed from the second floor during a bathroom renovation in the 90s). This one, on the third floor is begging to be restored. More to come on this!

img_0109

Two staircases provide access from the main floor to the second.  The front staircase includes extensive millwork and wide steps- the back staircase, more simplistic for the staff (sadly the staff has gone the way of the butler) without lighting and stairs that are significantly taller with shorter treads.

img_0110

Three original light fixtures are still intact and in use. The foyer, the butler’s pantry, and soon to be restored, the back porch light.


Original millwork, including picture rails, living room fireplace surround, as well as paneled doors (and knobs) are throughout.  Solid hardwood, these elements are as they were when the house was built. The only change, white paint in the 1990s. The original picture of the fireplace shared by prior owners.

We’ve already looked at the floors, windowsbutler’s pantry cabinets and hardware, but there are a few more original surprises to come- stay tuned.

Just peachy.

Paint.  The easiest and most economical update, but also one of the most daunting.  We could name each house by the primary color scheme it held when we purchased.  Our small city townhouse, white.  Our first suburban home, beige.  Our second, gold.  And this house, peach (see photographic evidence above).

While we are capable of painting (and in every other house painted the interior ourselves), this 1920’s plaster walled, wallpaper and peach infested space called for help from professionals.

Before World War II, homes in the United States were built with wood lath walls covered with 3 coats of plaster. This process resulted in walls approximately 1 inch thick (compared to the 1/2 inch dry wall of today) that are strong, sound dampening and an R value greater (insulation rating) than dry wall alone.  Preserving and repairing the existing plaster not only maintains the historical significance and authenticity of the home, it is also environmentally responsible.

With that in mind, we hired a painter with the patience and willingness to strip the wallpaper and make the necessary repairs to the existing plaster.  In the case of rooms with 50 year old wallpaper, the walls had sizable cracks and required a tremendous amount of time and attention.  The finished product maintains the feel and quality of the construction, with a fresh and updated look.

This work, although time consuming can be done by any homeowner!  If we endeavored on this ourselves we would just be finishing as the kids set off to college, so I am very happy we hired a painter.  However, if you are brave enough to do it yourself below are two great articles on the process:

removing wallpaper

repairing cracked plaster

The work in process.

Next Up:  Color.