Devoid of any original facets, we looked for hints of what may have been included in the original kitchen.
The adjacent Butler’s Panty seemed the best indicator of cabinet style and scale.
Behind a collection of old doors and window frames in a dark corner of the (rather creepy) basement we discovered a 48 inch soapstone sink. Whether part of the “summer” kitchen that once stood in that space or part of the main floor kitchen, we knew this find had to be incorporated into the plan.
After lots (and lots) of research we identified a family owned cabinet company and a local contractor willing to work within these original parameters and a homeowner who is a stickler for the details.
And both loved the idea of incorporating the 400 pound soapstone sink- we were off and lugging!
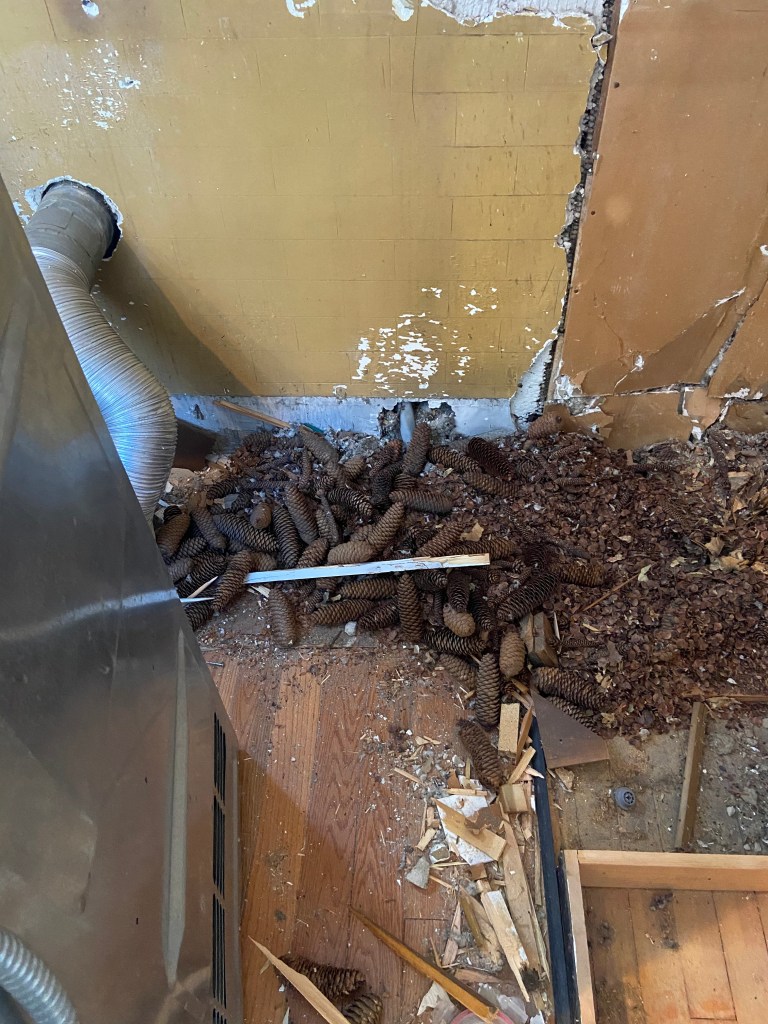
With the demolition underway, so begins the mess and surprises. While an expected part of the adventure, one unanticipated find. . . pine cones.
Not just one or two, but hundreds. Squirreled (pun intended) beneath the 1950’s built in place cabinetry. While the Contractor assures us the furry friends have long since vacated, the evidence suggests otherwise.
The good news- walls are now sealed and debris removed, but I can’t help but wonder if the squatters will return.
Notable finds:
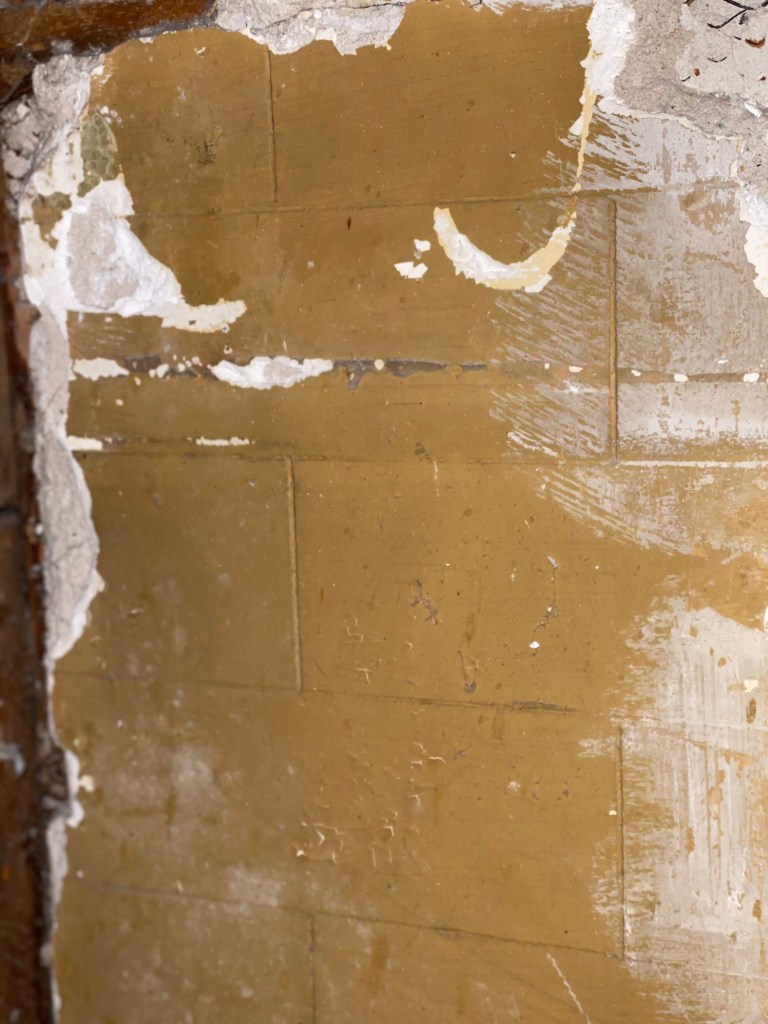
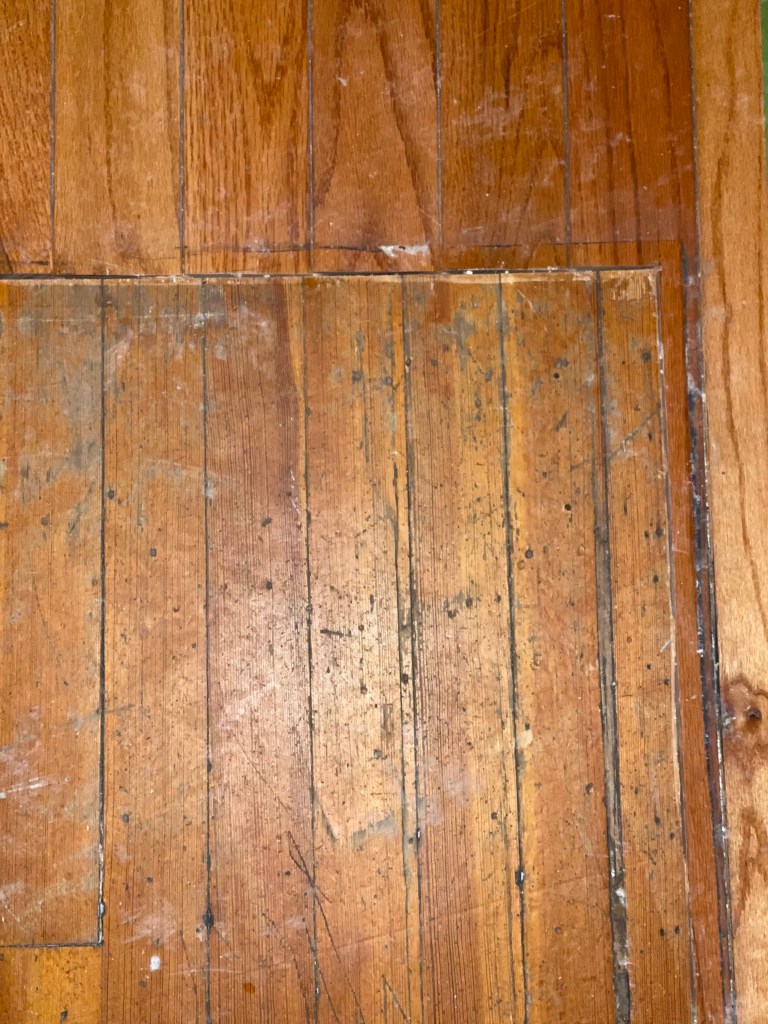
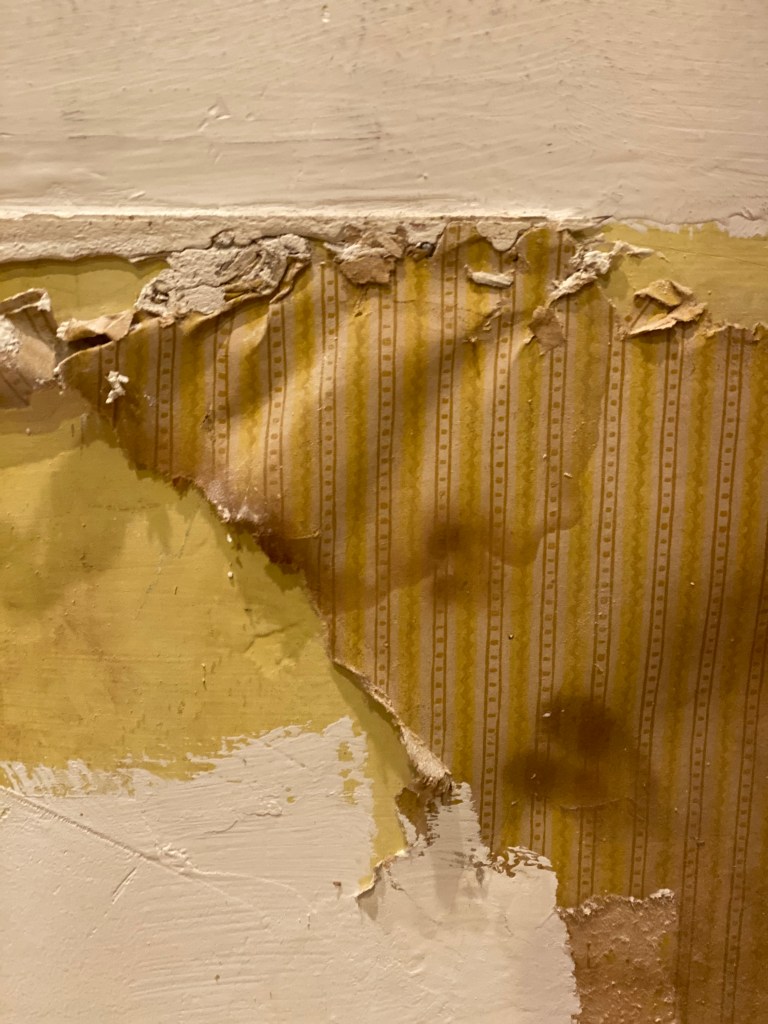
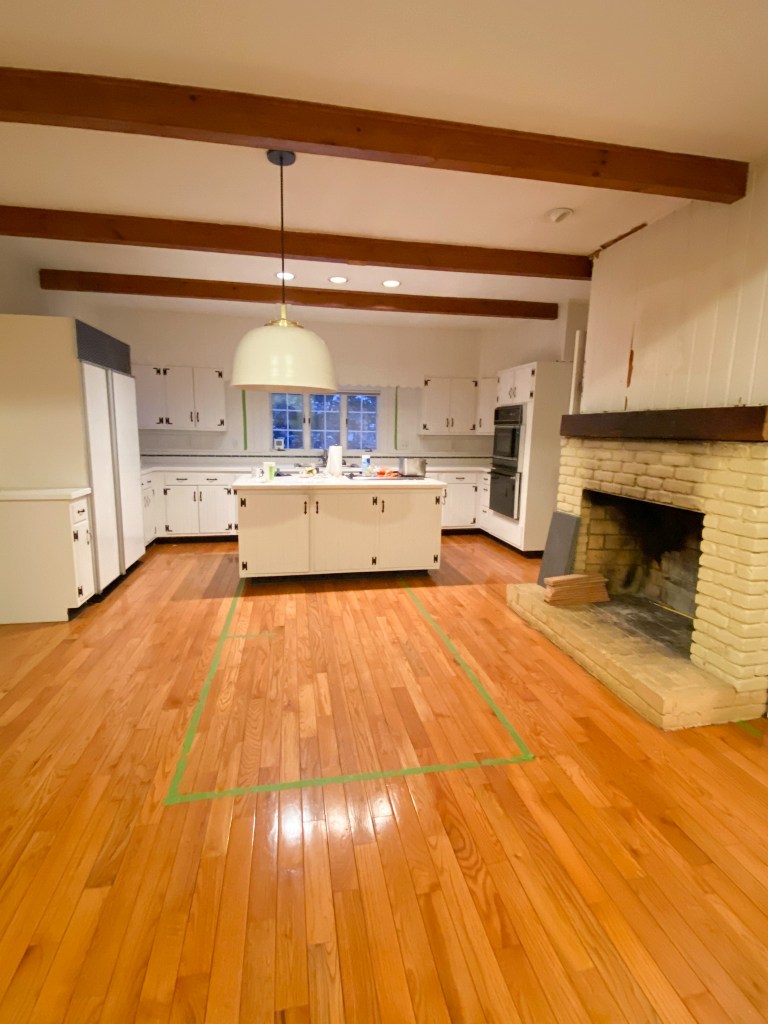
For the record, had we ever encountered the animals assembling this stash, I would have fled.Hand forged iron nails.An original coal stove replace by an added fireplace in the 1950’s. Work to be done to bring this to code.Hand scored plaster uncovered. Common in homes of this time period.Original floors replaced with refinished oak in the 1990’s. Original still remained under cabinets.Evidence of original window placement and clues as to the timeline of renovations. Plaster under sheetrock, under more sheetrock. All now removed for a blank slate (and a little more headroom).Wallpaper circa 1930 something.
When the house was built, there was a basement “summer” kitchen, complete with 48 inch soapstone sink and dumbwaiter to the first floor. With stone walls and iron windows, this space is still pleasantly cool in the summer.
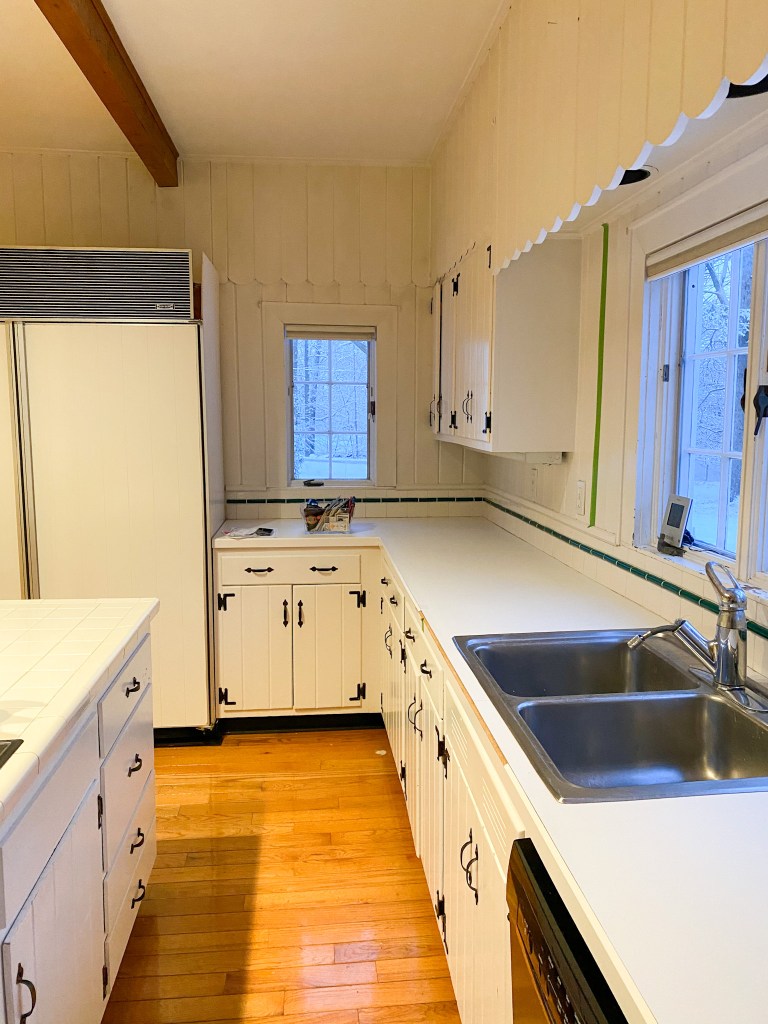
The current kitchen (located on the main floor), features knotty pine cabinets most likely added in the 1950’s. When the house changed hands in 1990, a refresh of the kitchen included pre-finished oak floors, state of the art appliances (for the time) and an island with white ceramic tile and grout.
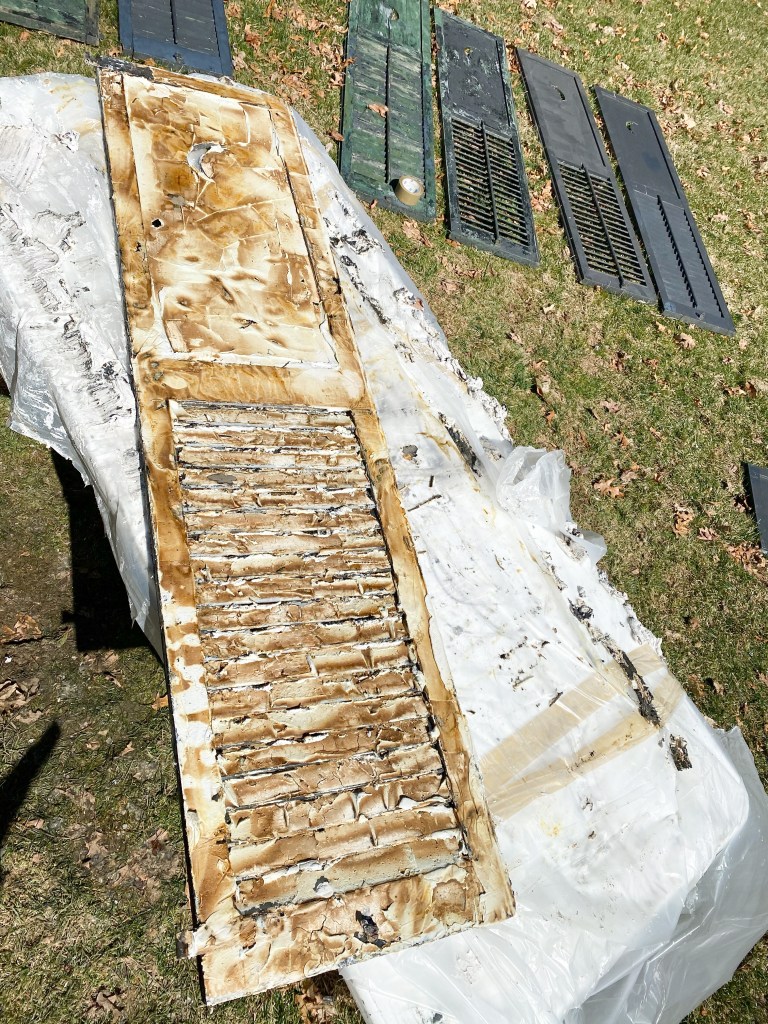
In varying condition, the original shutters that adorned the front and dining room side of the house were removed prior to painting. As with the restoration of the Butler’s Pantry doors, our painter’s response to the question of stripping and painting them was, “It would be less expensive to replace them.”
Out of the question. If we have learned one thing in this process, it’s do your research. Builders, painters, and the local hardware store will always tell you to replace your windows, buy new shutters or get new doors and hardware. For a number of reasons house components 100 years ago are (almost) always better made than even the highest quality items purchased today). This includes wood siding, windows, doors, hardware and so much more. I will spare you the details in this post, but please reach out if you’d like to learn more.
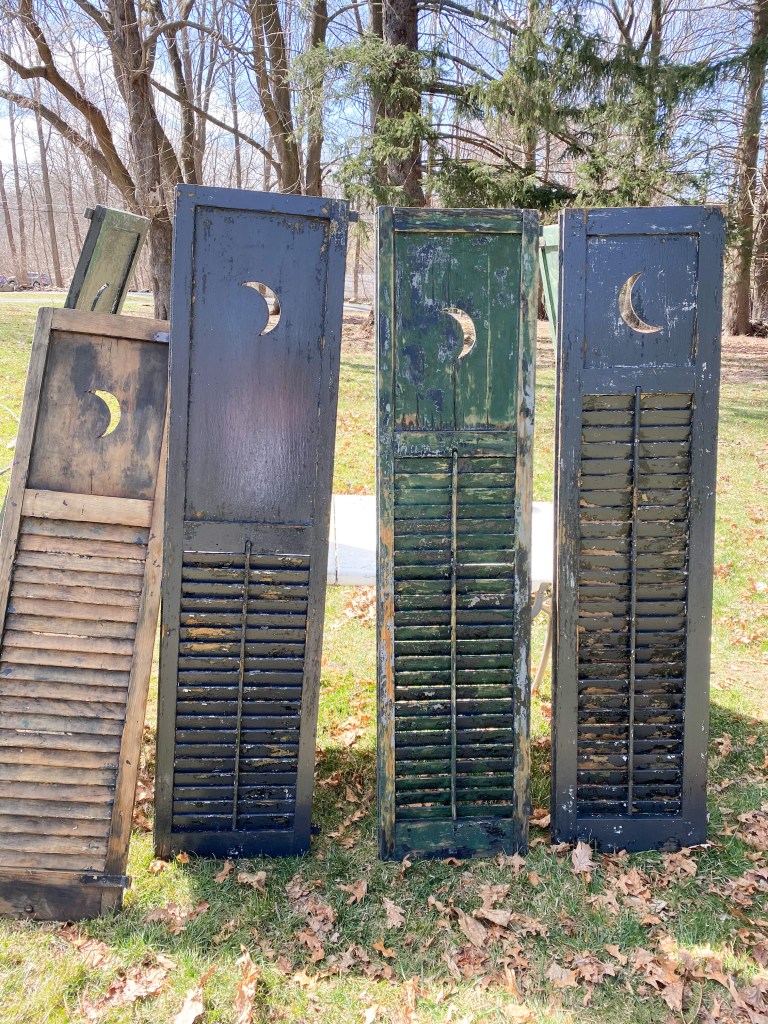
Thanks to The Craftsman Blog, The Old House Guy Blog, and a number of other online resources, I learned a safe way to strip the numerous layers of paint and return the shutters to a condition where they can be painted and rehung.
Progress so far:
Covered in Dumond Smart Strip to safely encapsulate old paint.
In various stages of the process. And yes, they are all slightly different . . . the next challenge.
A note: Wishing everyone good health. Dusting off the blog in an effort to be productive and provide a distraction. Thank you for following along. Some of this work was completed in the Fall, but several DIY projects going on now. Be well!
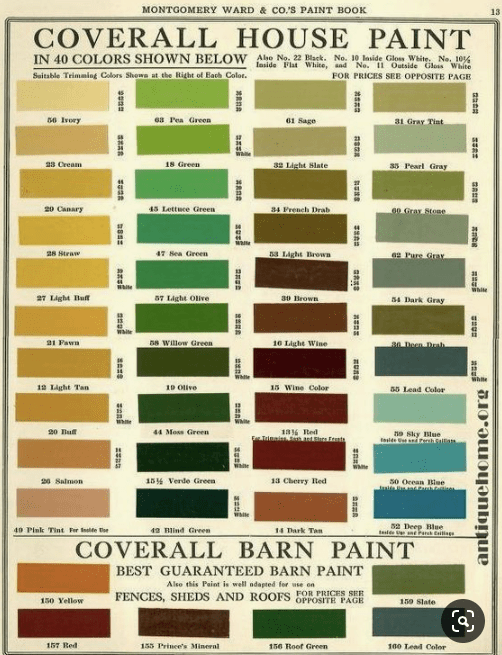
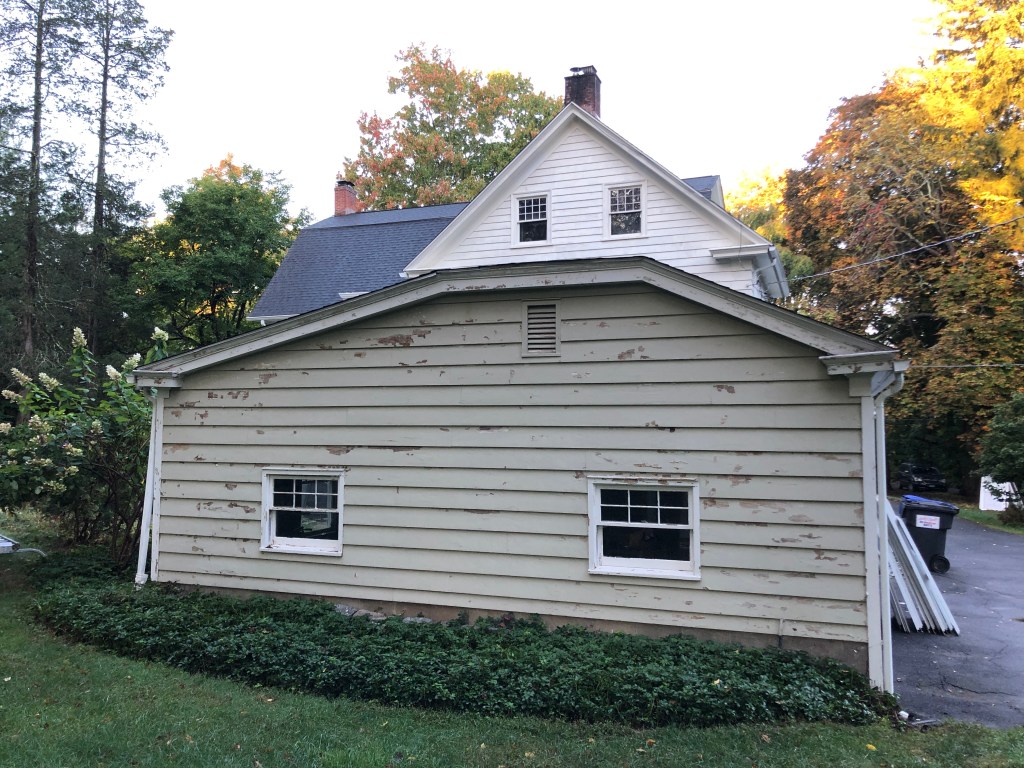
The upside of peeling paint is the opportunity to see the bottom layer. Our goal is to restore the house to its original state (to the best of our ability). So after some detective work we were able to find a color scheme close to the original, and forge a plan for the rest of the project.
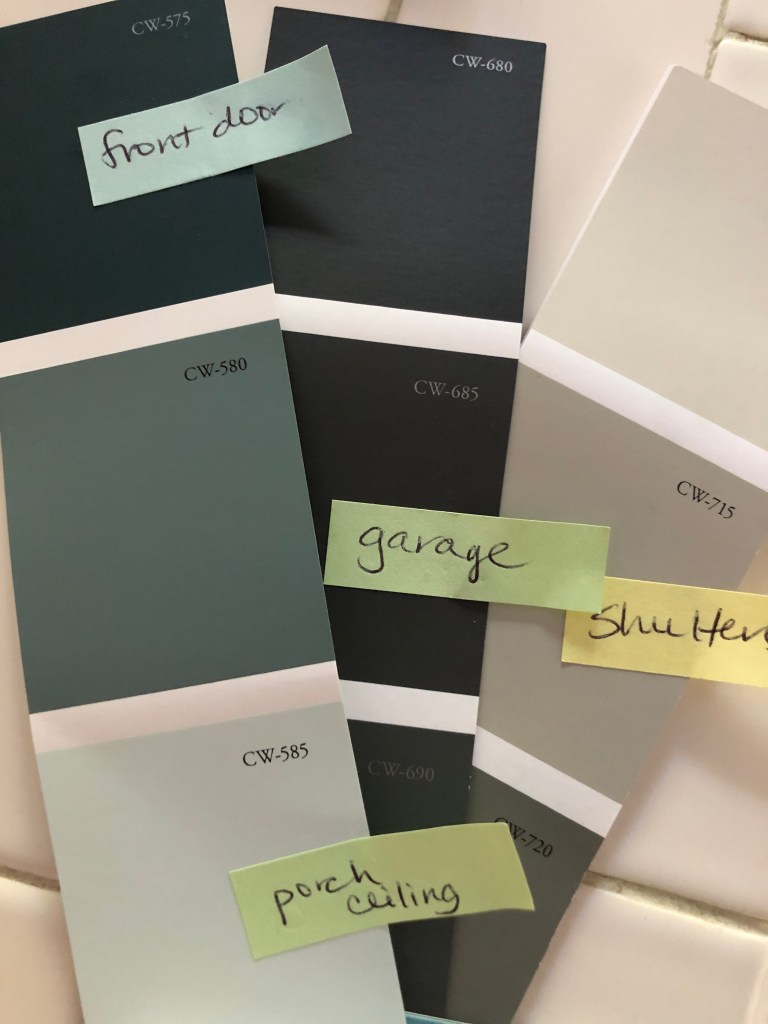
Samples, samples and more samples. White should be an easy selection, but there are hundreds of shades.
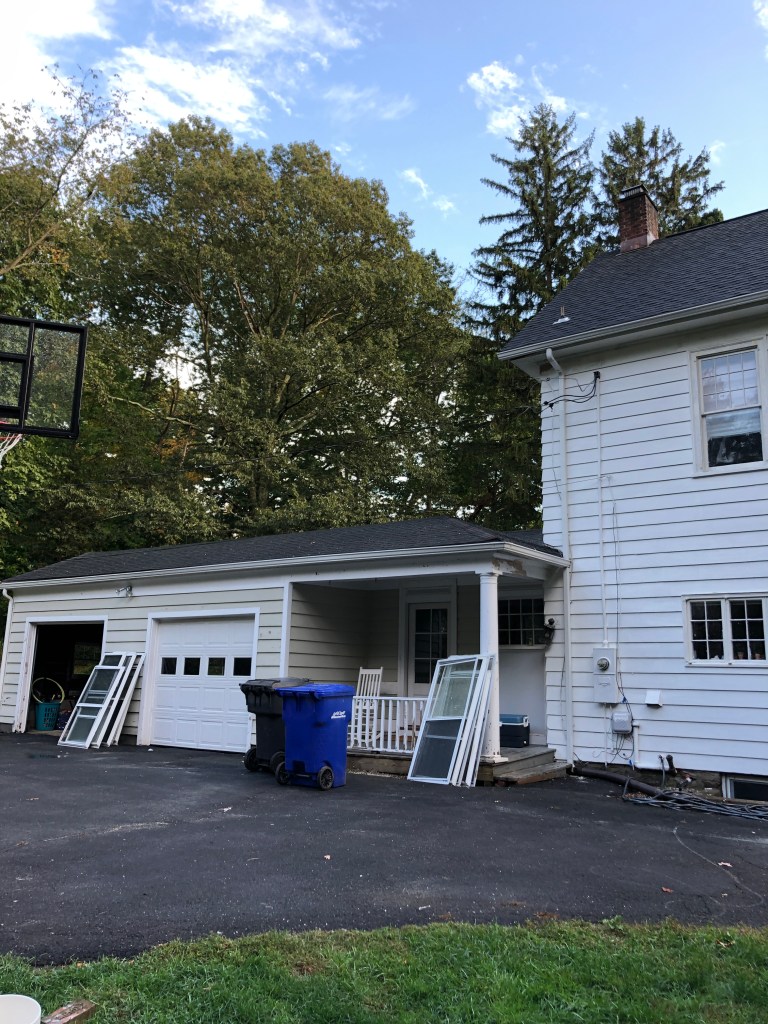
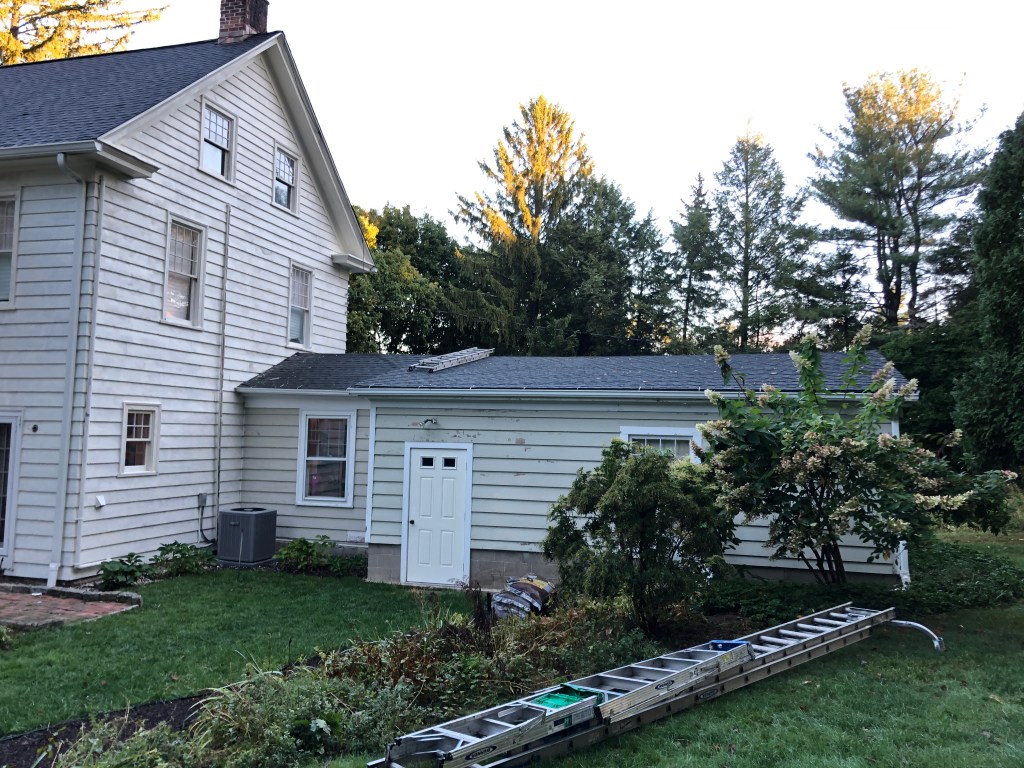
The garage, although attached to the house (adjacent porch, turned breezeway, later turned combined laundry/mudroom) was added sometime in the 1950s. Someone went to great lengths to match the siding, although due to the low roofline (most likely low as not to impede the view from 2nd story windows), it seemed out of place.
Attached garage added in the 1950s. Breezeway enclosed to create a laundry area later converted to a mudroom.
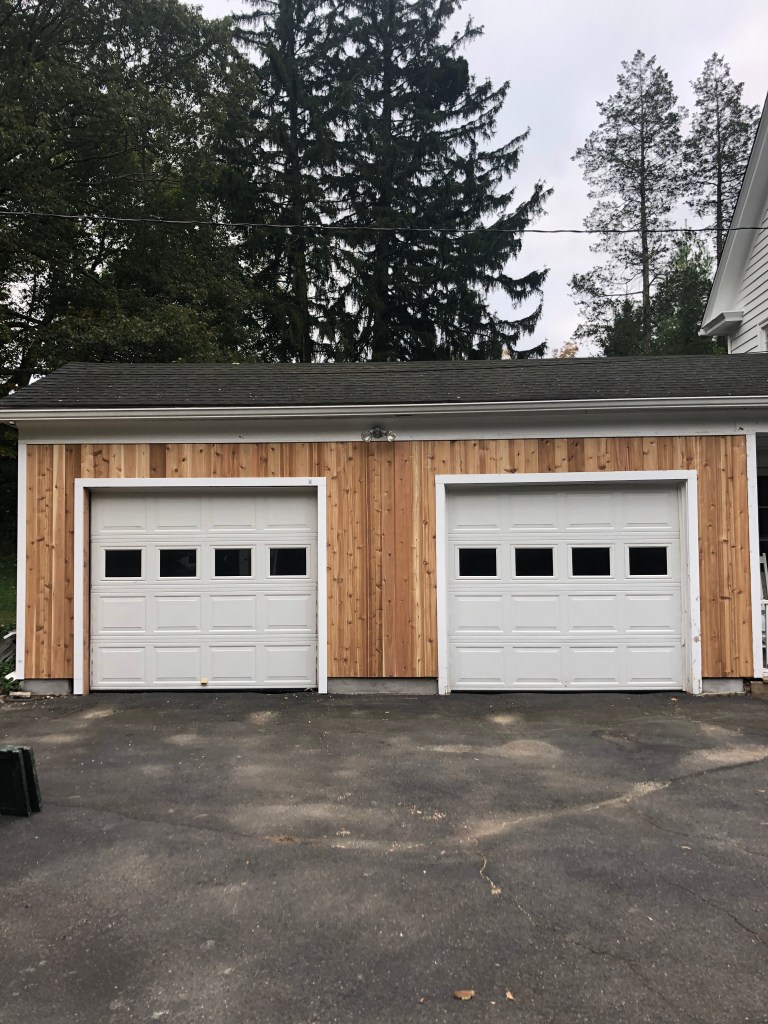
The goal: to create a more attractive garage to better reflect the time period of the house. In the 1920’s houses would have had a detached garage or barn or no garage at all. By changing the siding (we salvaged what we could for future projects) and painting it a contrasting color, we hope to accomplish a fresh new look.
By adding varied width vertical boards, the garage looks less like an extension of the house and more like an attached barn.
Color inspiration from a 1920s house paint book and choices from today’s color chart.
No mispelling. Peeling paint is visible everywhere. The exterior is the final painting frontier. The inside has been painted from top to bottom and floors refinished.Windows restored to full working order and fun restoration projects in process.
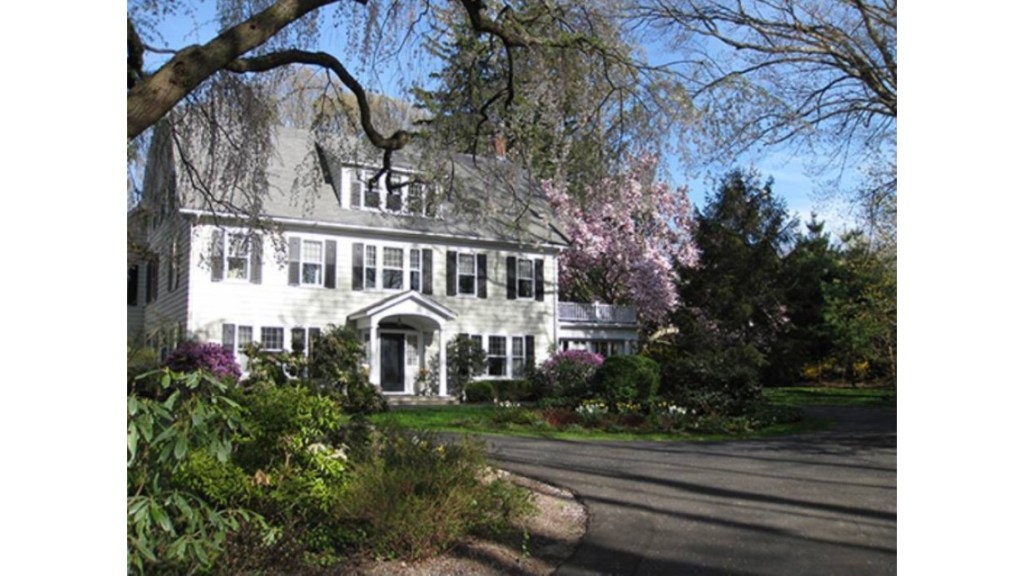
The exterior, well, see for yourself.
Don’t be fooled by this photo, it was taken 10 plus years ago when the house was originally listed.The reality, peeling paint, shutters in need of attention and coats (and coats) of old paint.
The most daunting part of this process is that one project seems to lead directly into the next. Just as we are making use of the wonderful new laundry room, we are taking down walls in the basement and so on. The dressing room in in the works, but in the mean time . . .
With the help of a dear friend (and neighbor), it’s time to tackle the 3rd floor project with a goal of planning and completing one room at a time. The walls are painted and the floors redone, there is existing furniture, and some additions to be made, but no finished product.
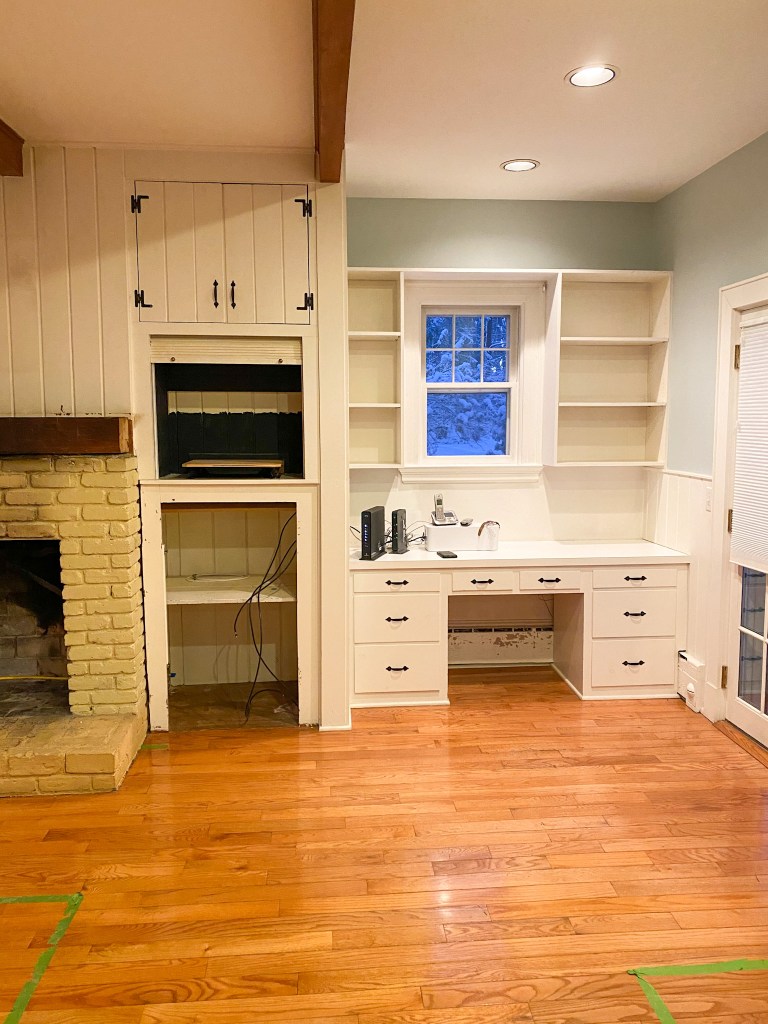
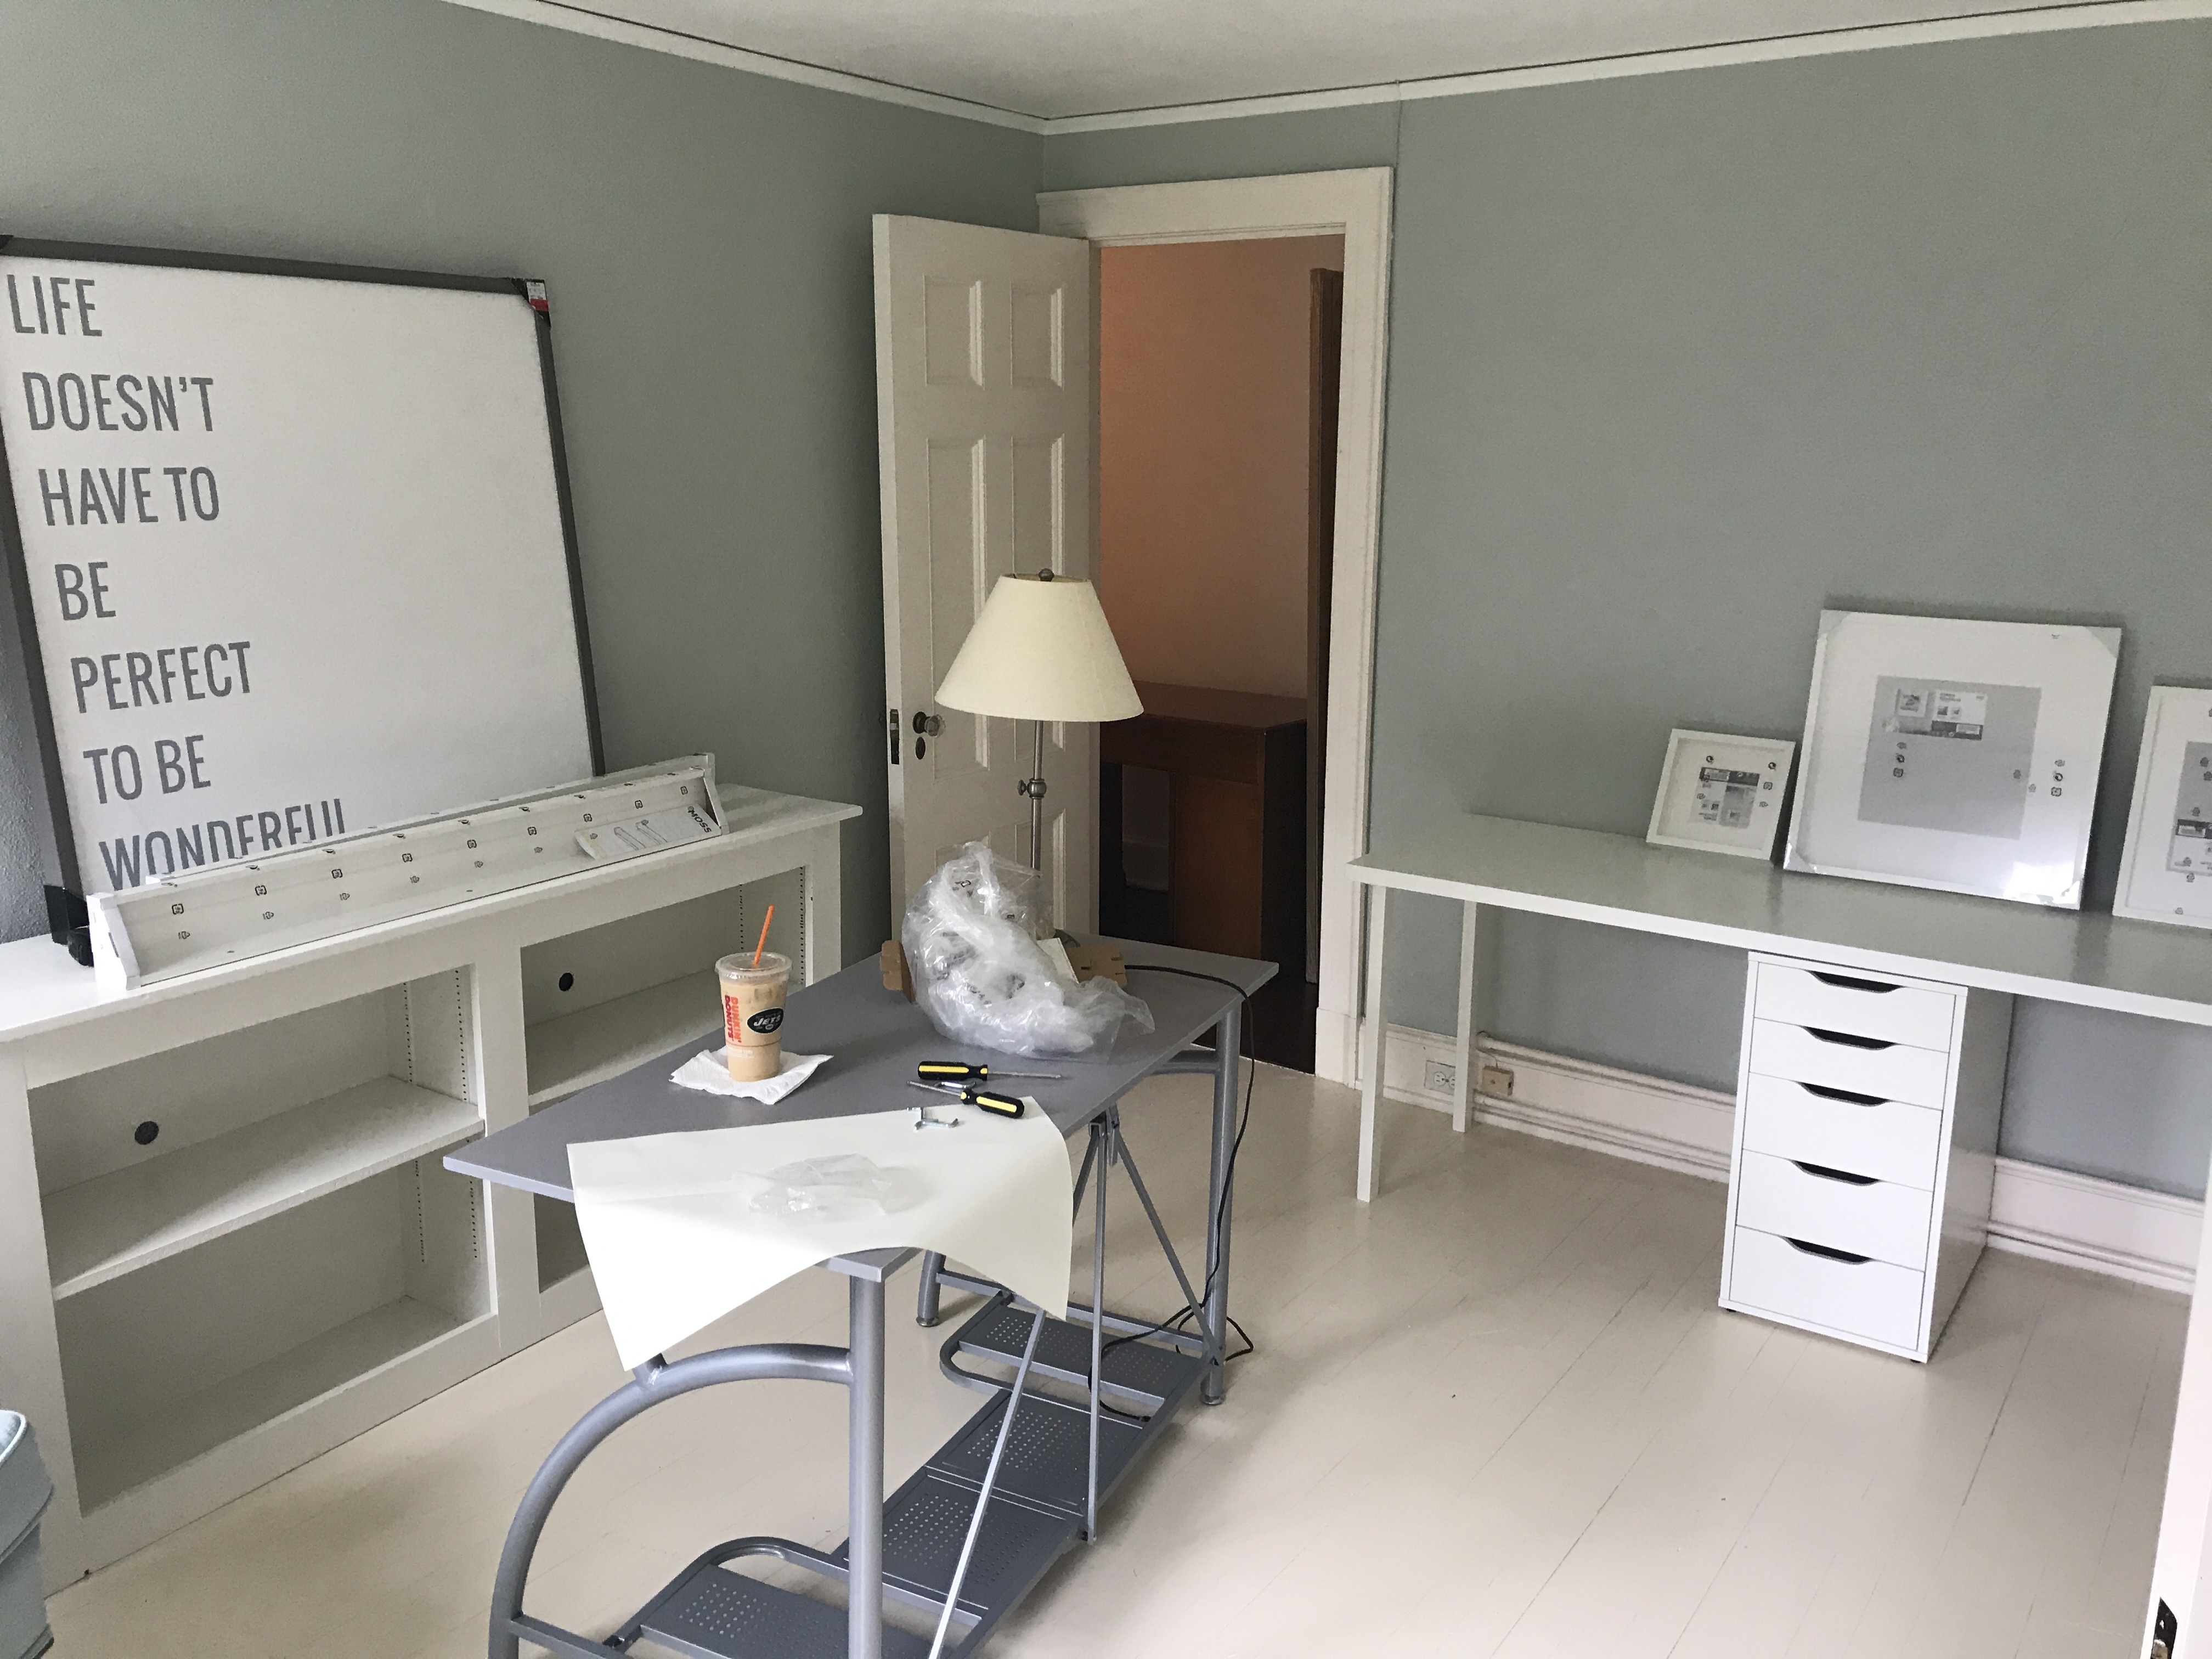
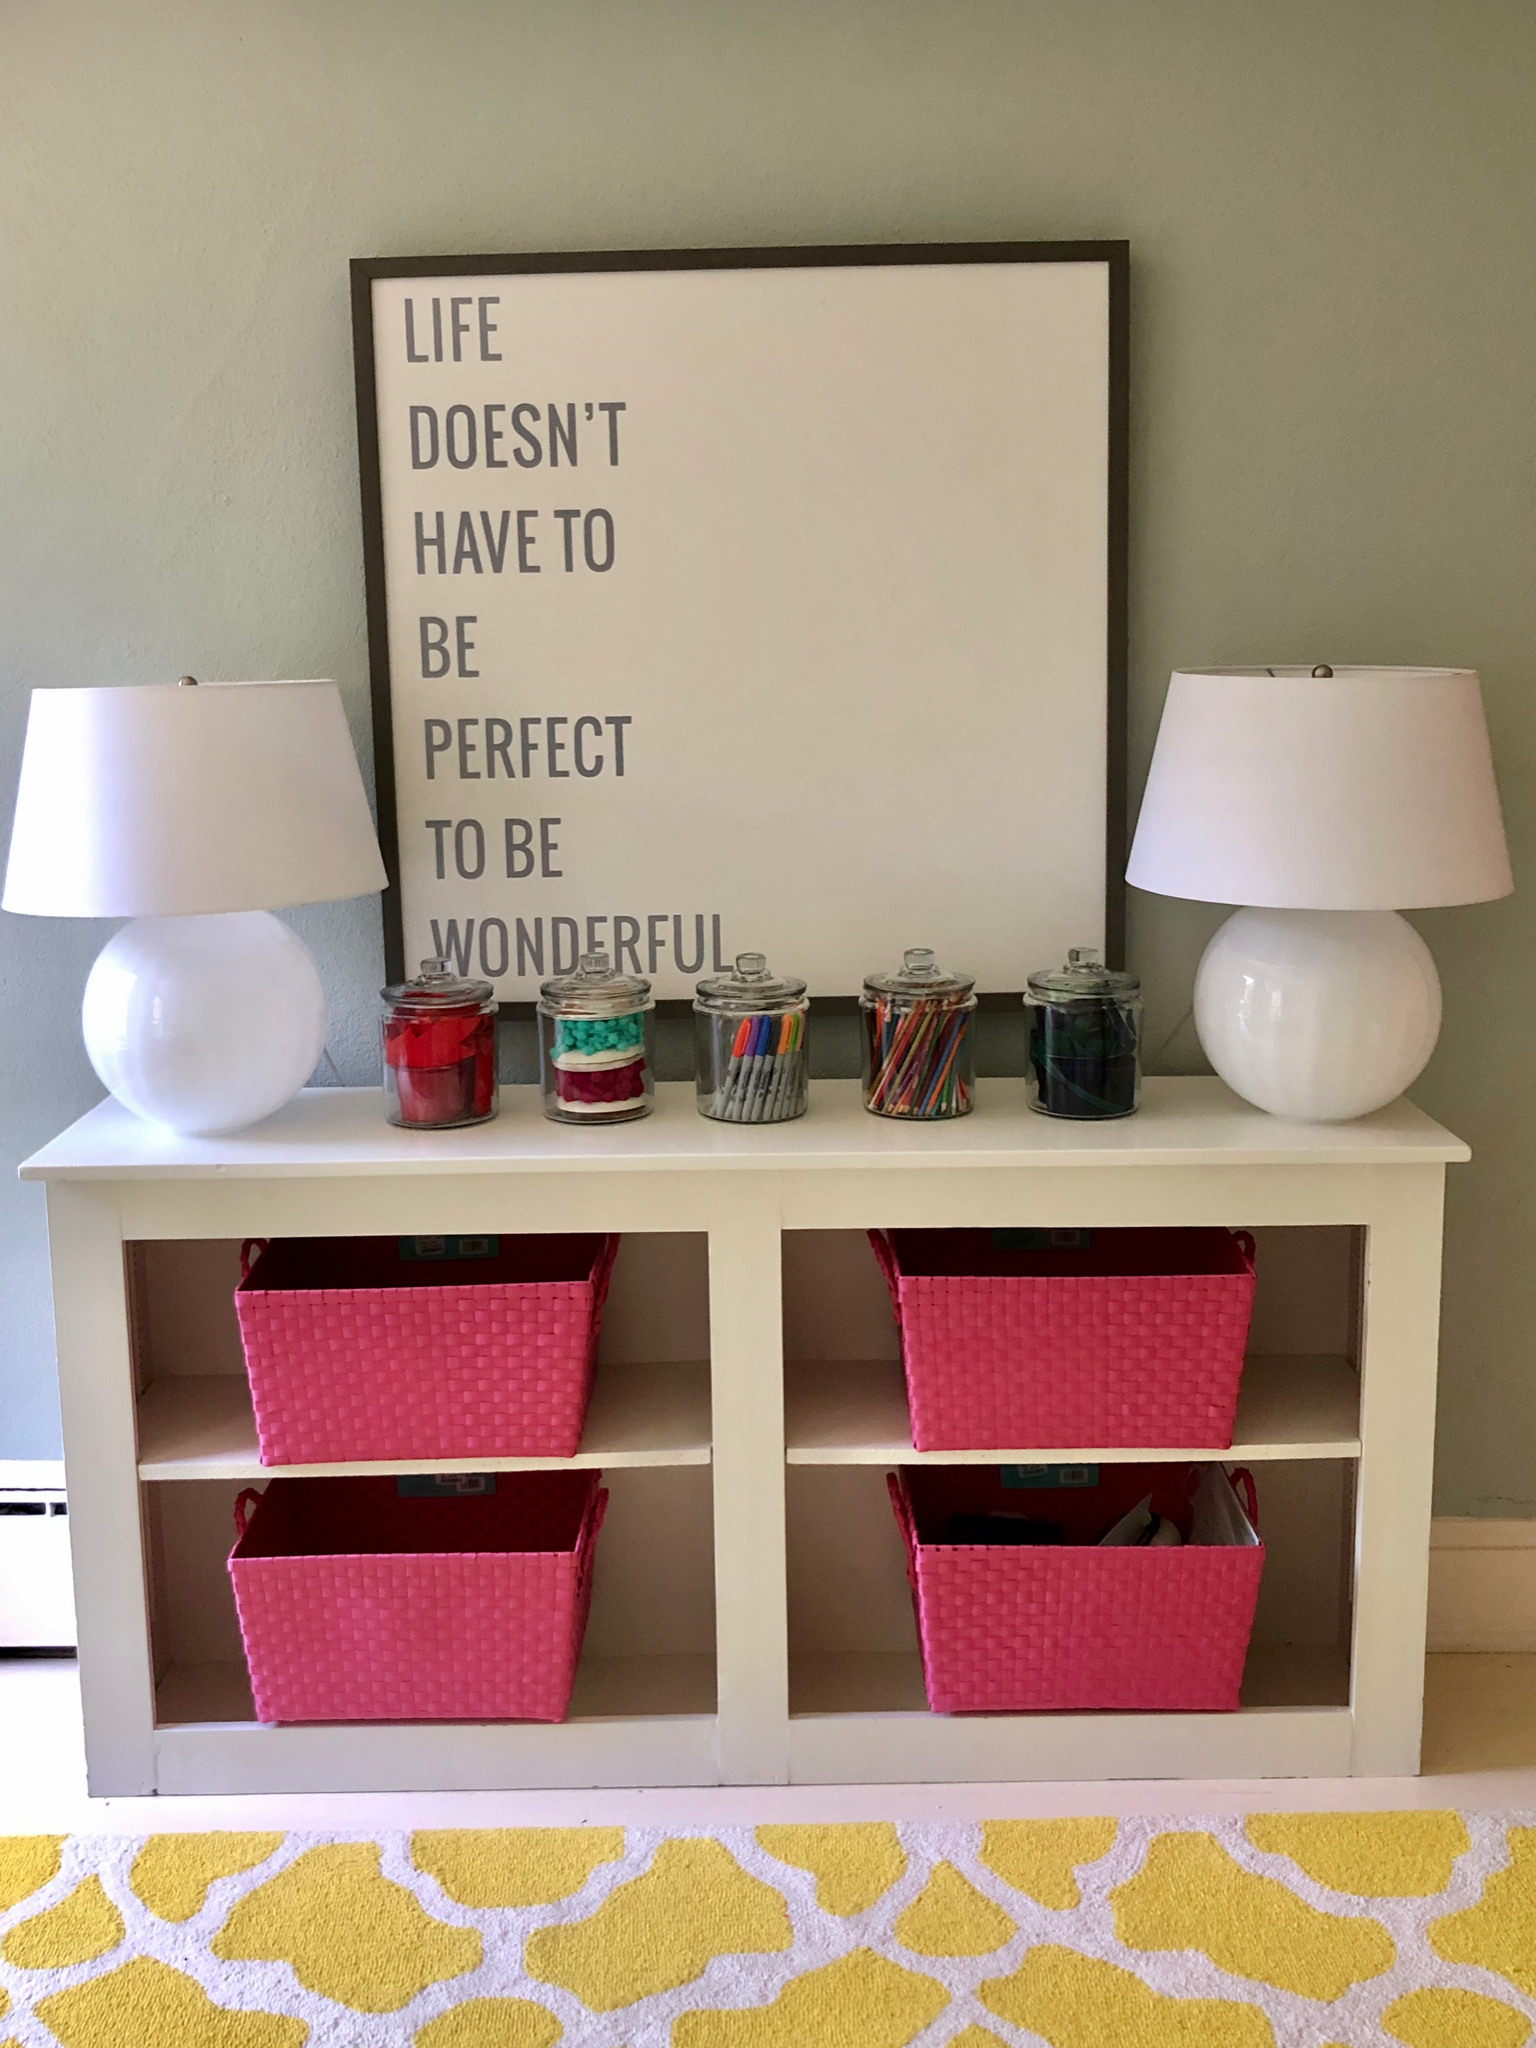
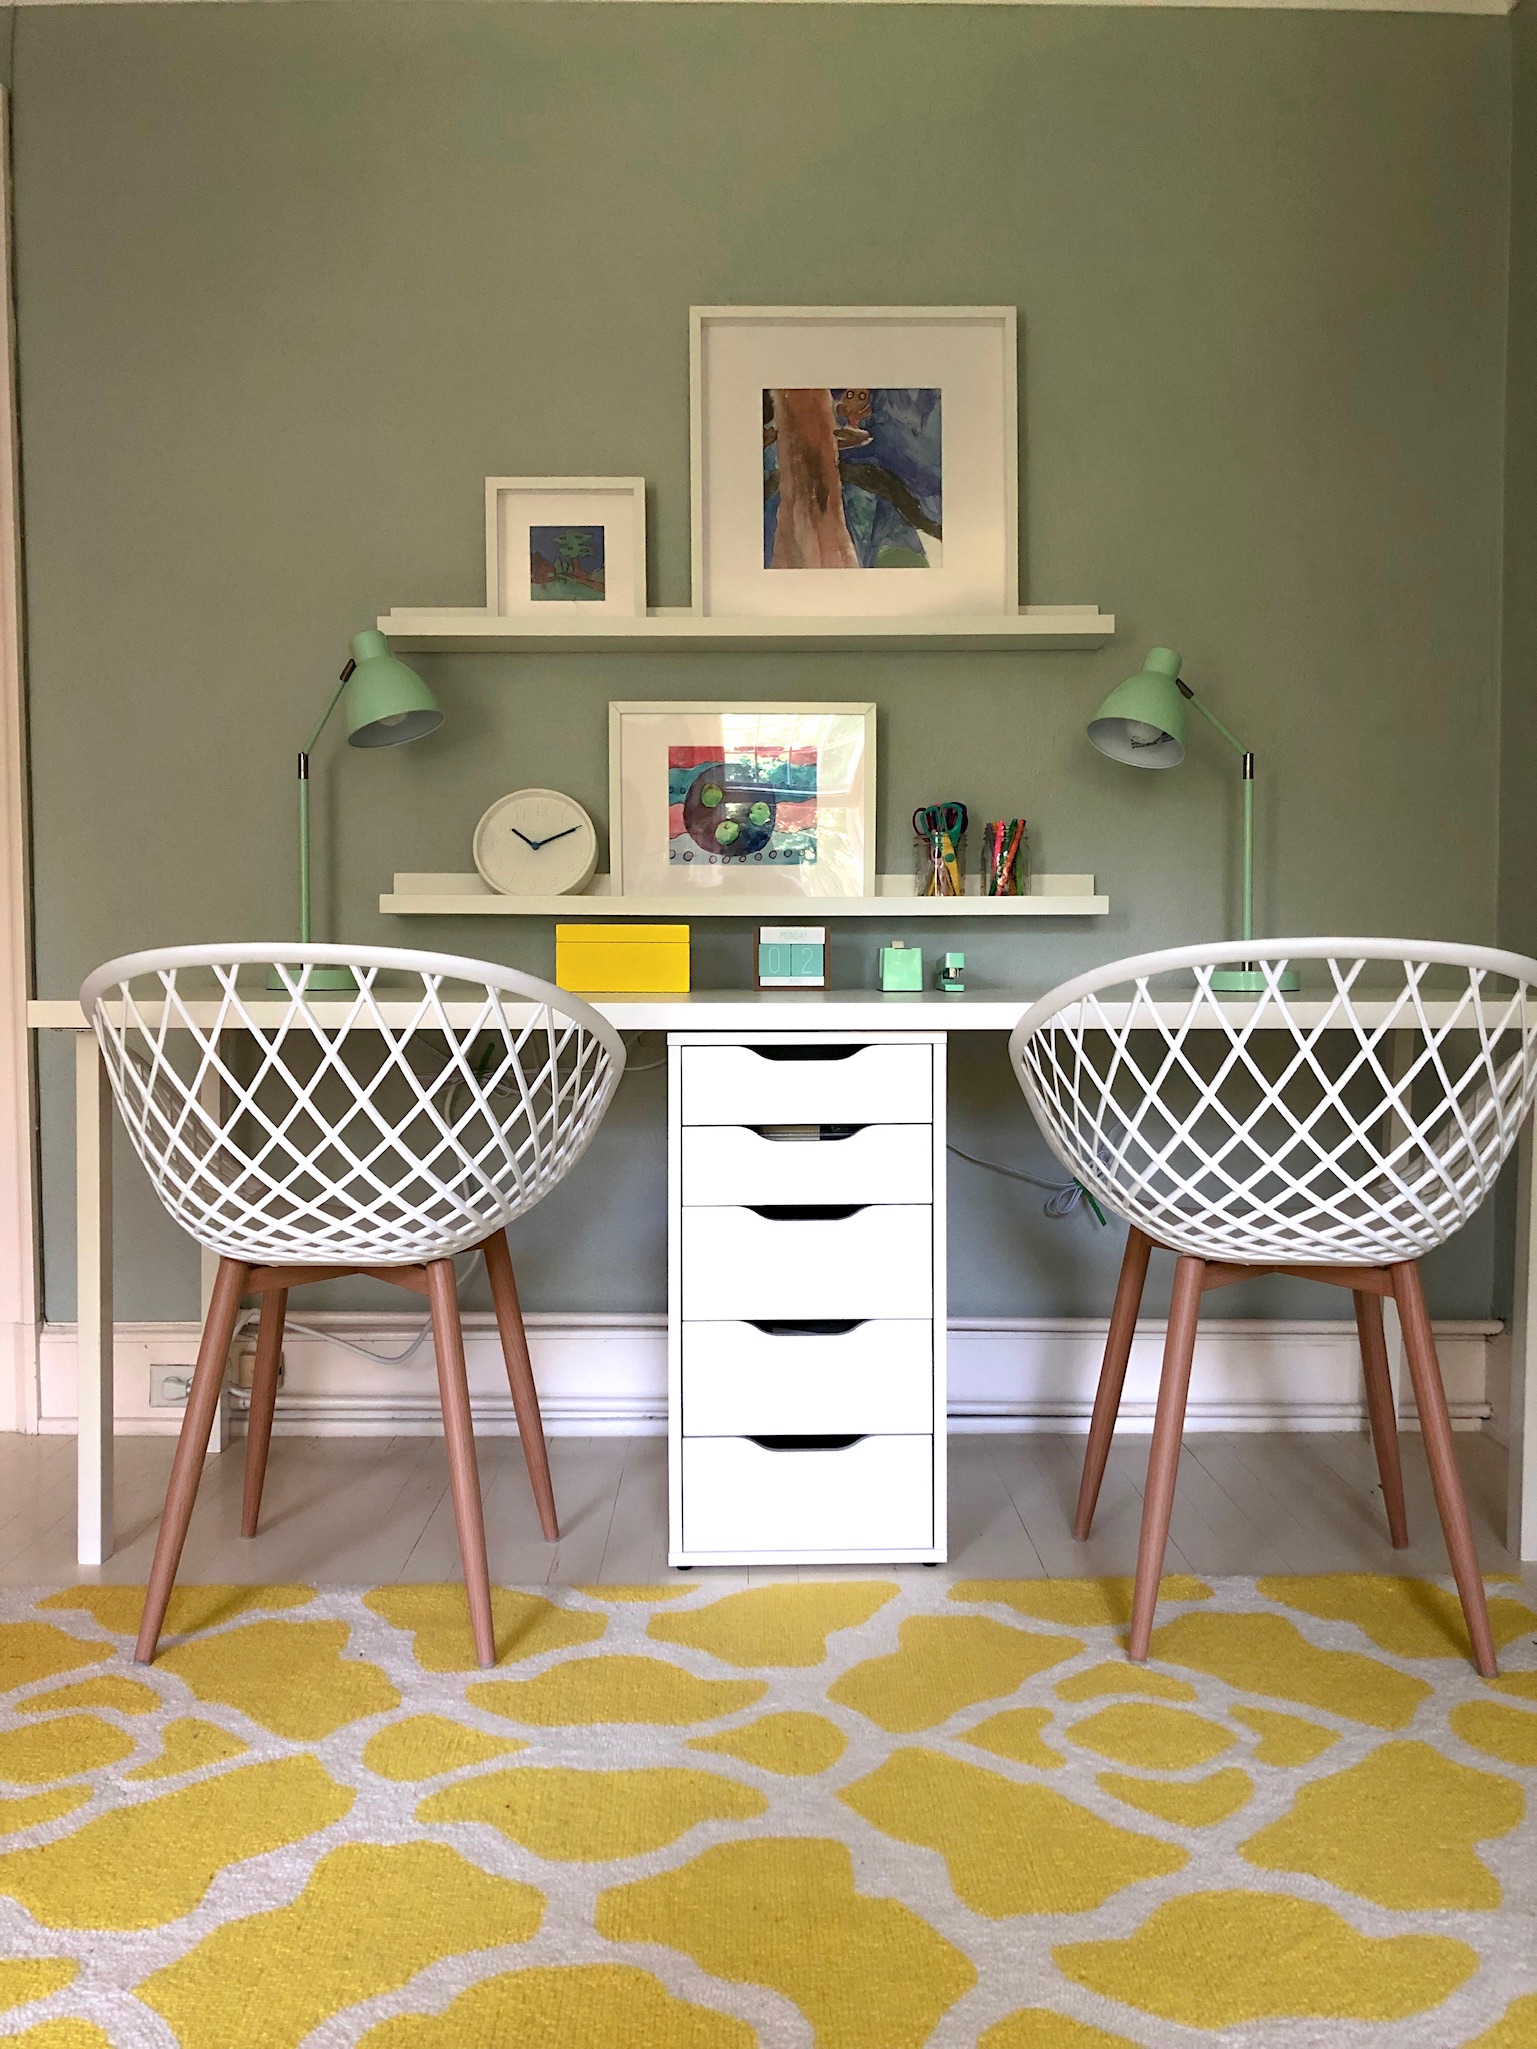
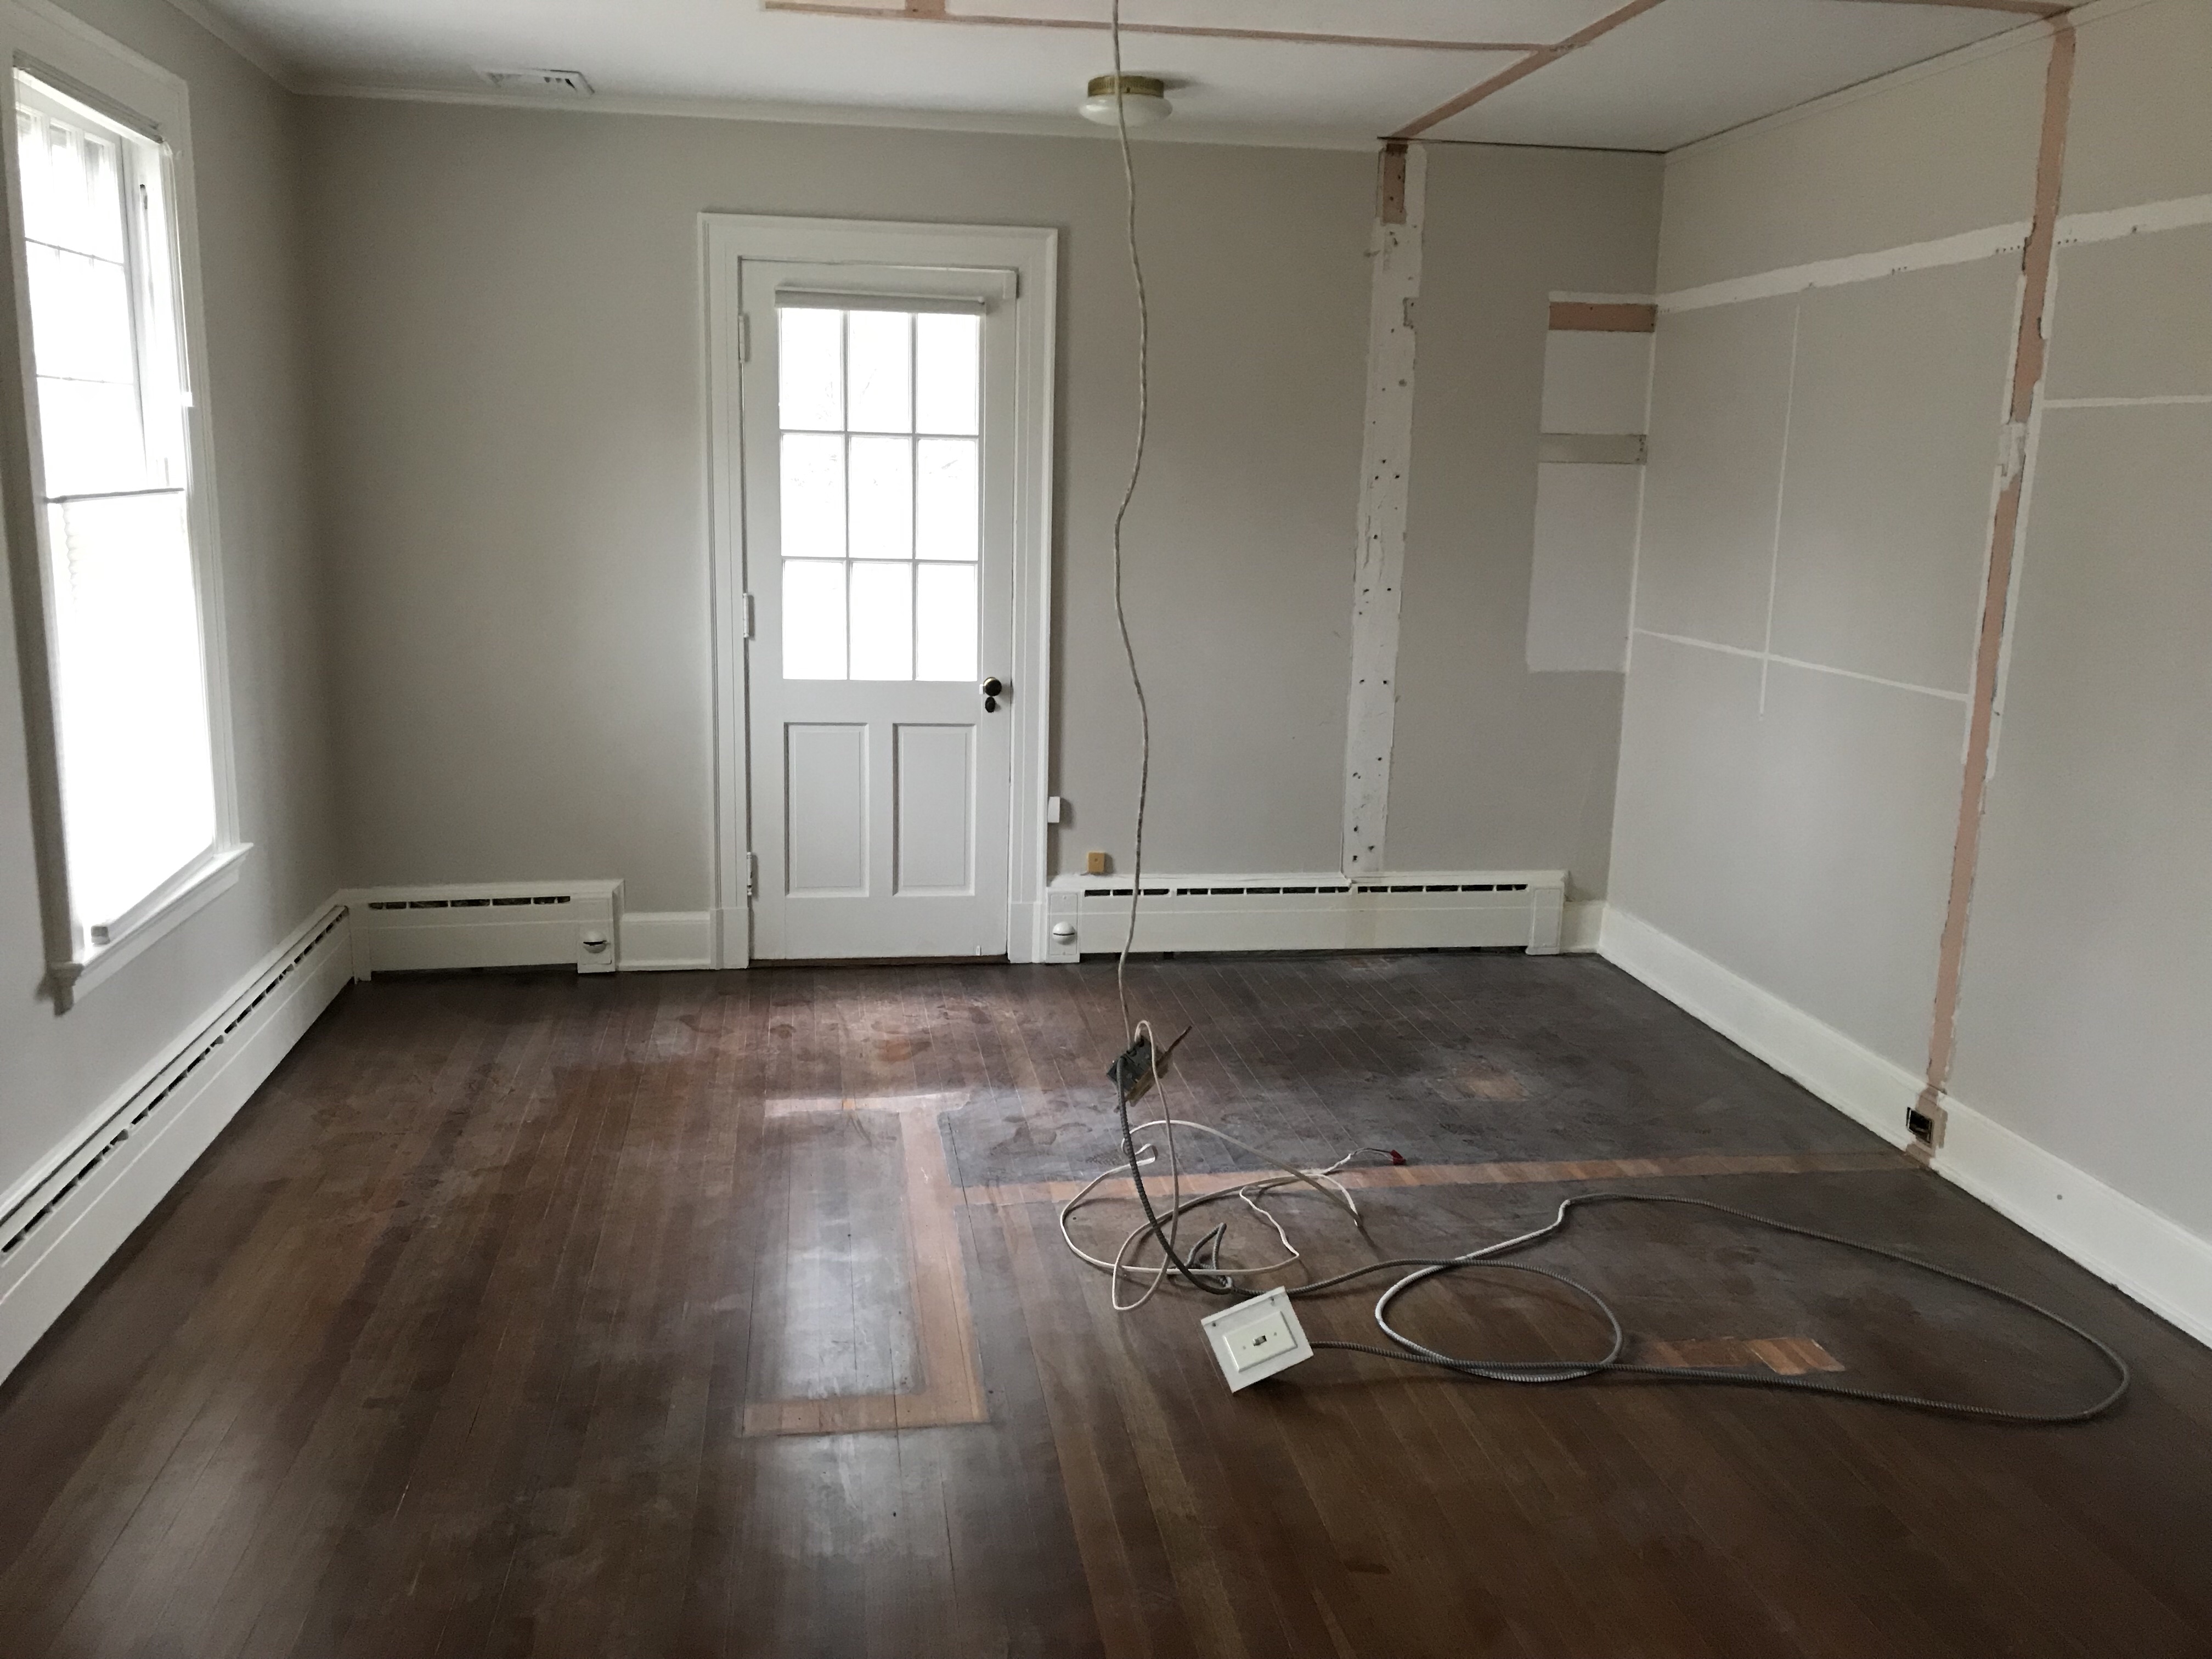
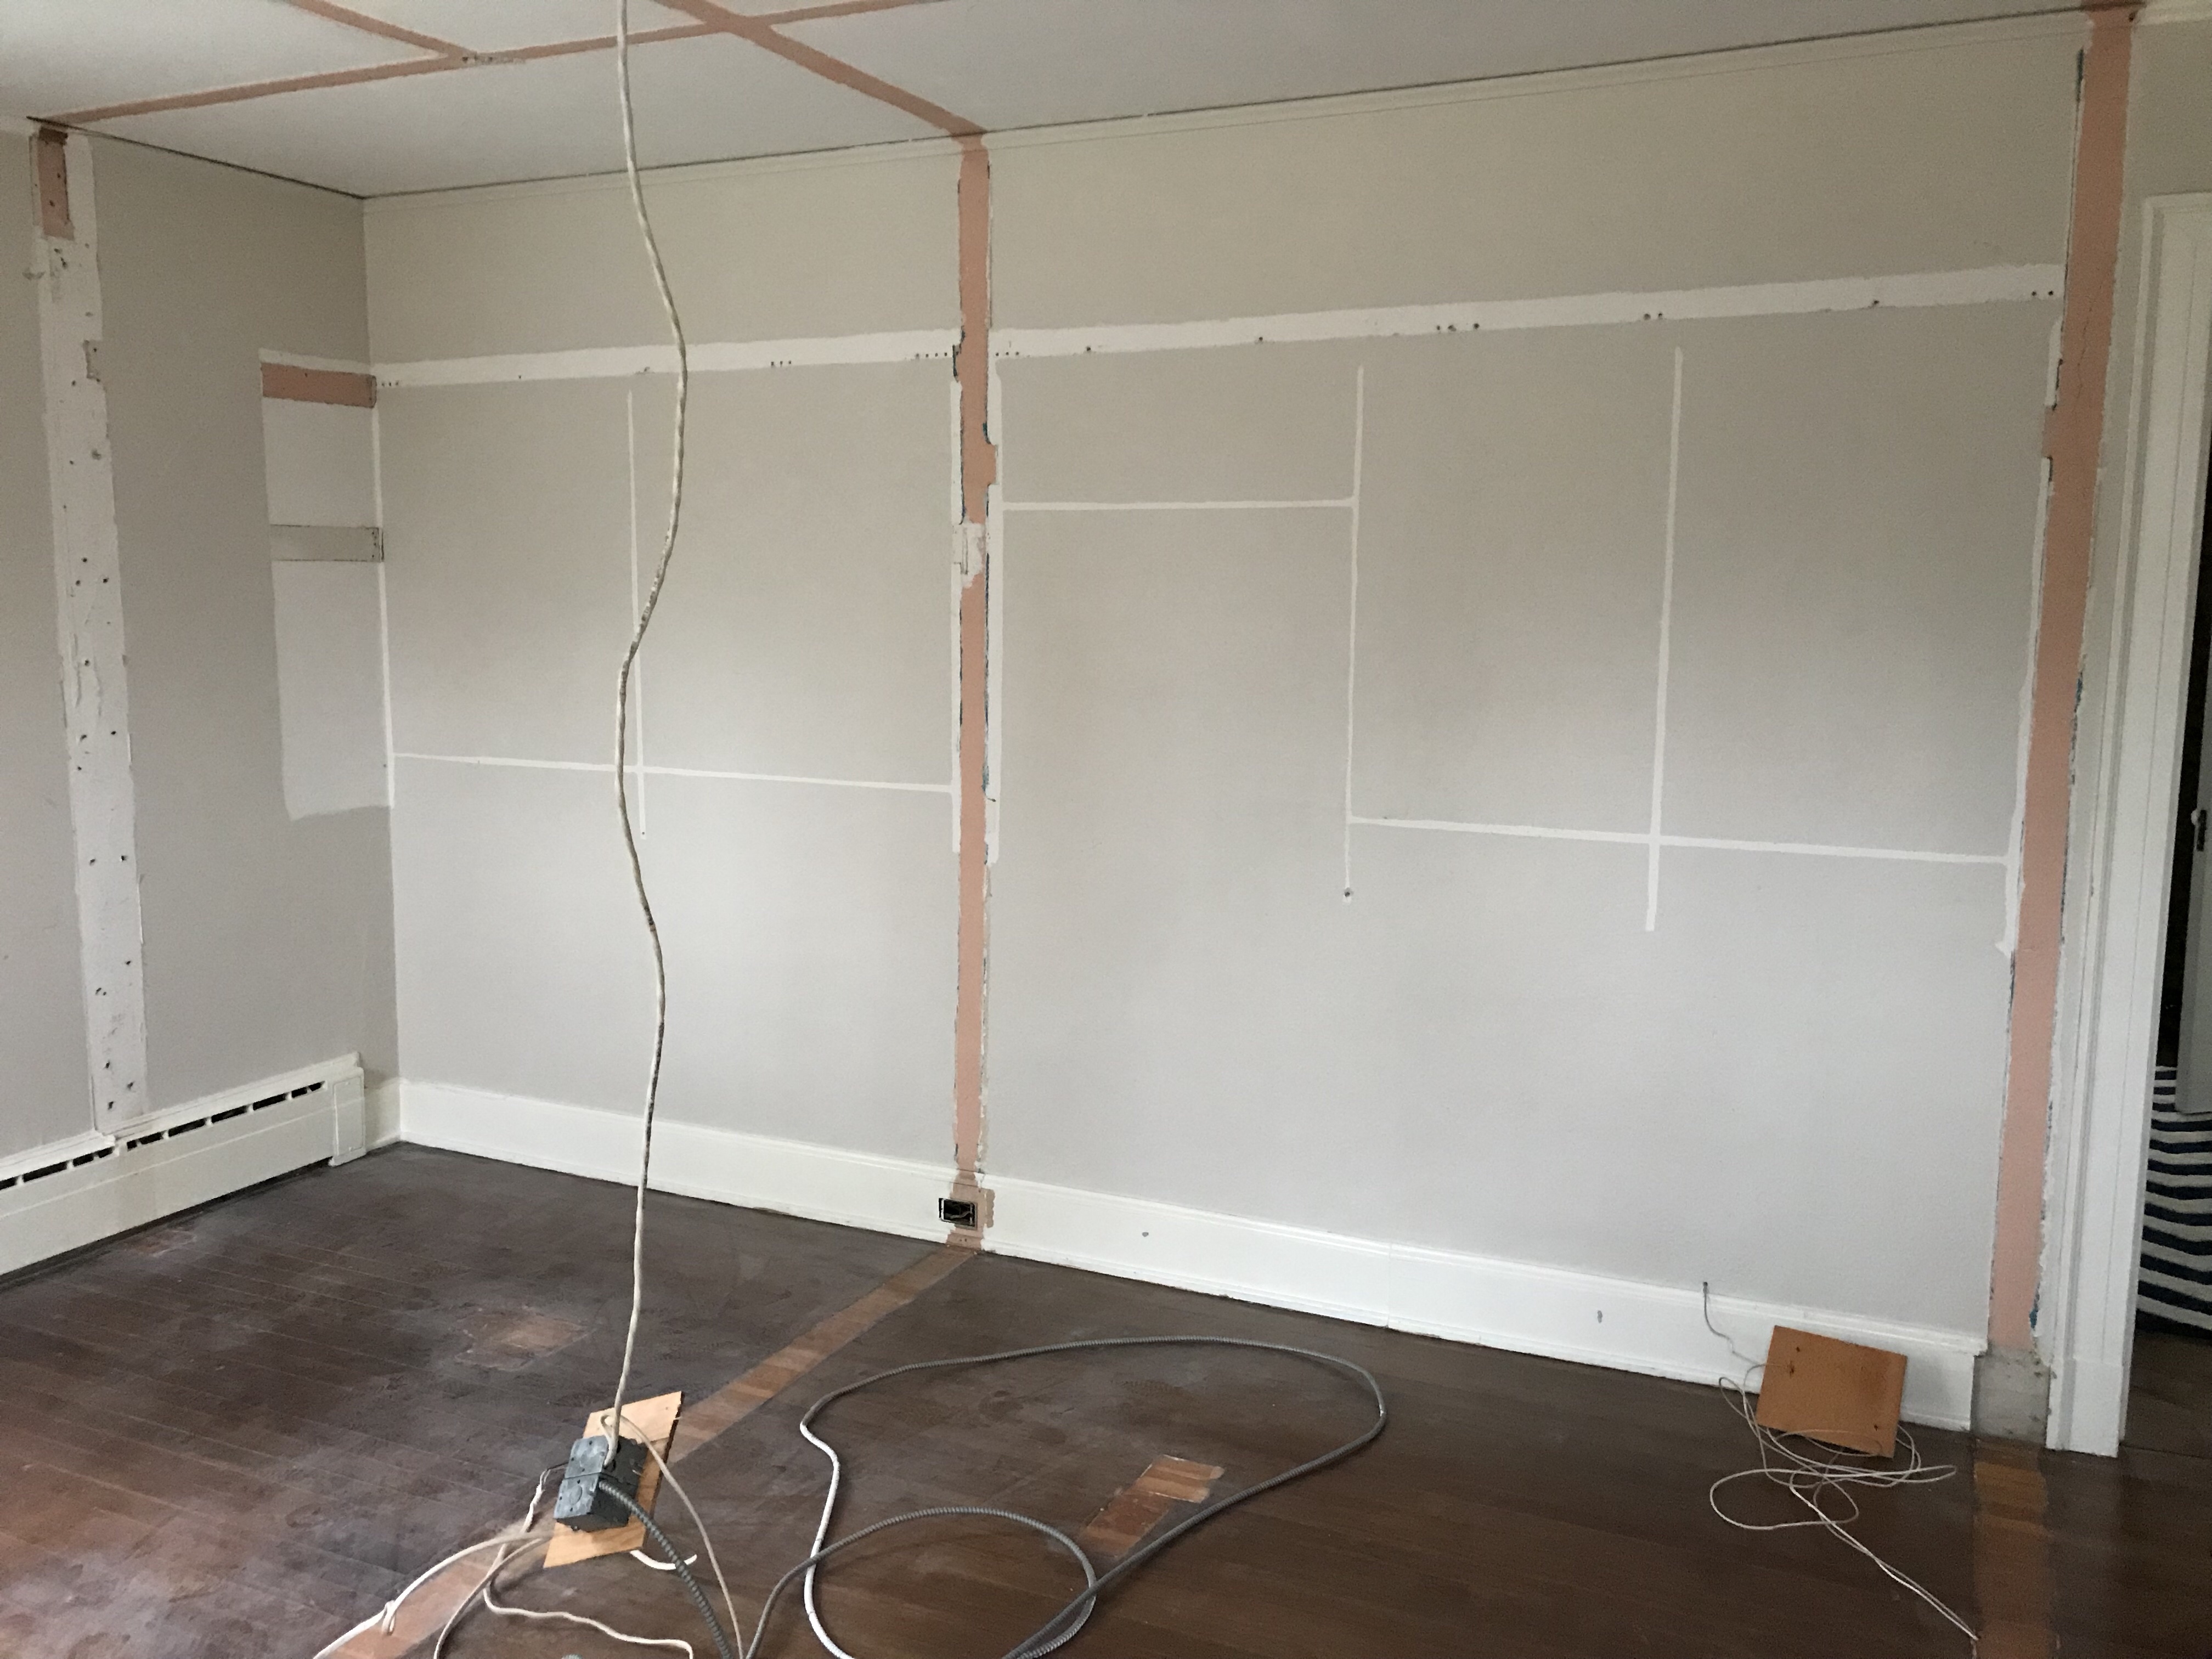
First on the list, a combined home office, homework zone and craft area. Some pictures of the empty space . . . utilizing existing furniture, online shopping resources and a little creativity, time to check this project off the list.
Space planning is simple once demo is complete, or so we thought . . .
Now for a problem solving exercise:
Square shaped room (almost) with three interior doors (bathroom, hall and bedroom), one exterior (access to area above screened in porch) and two windows. Hmm. Conventional closet solutions make use of small, well defined areas with lots of wall space. Not exactly the Branchville 1923 scenario.
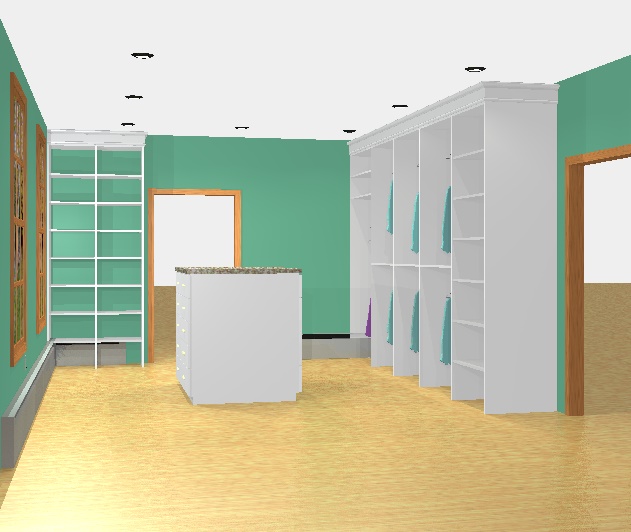
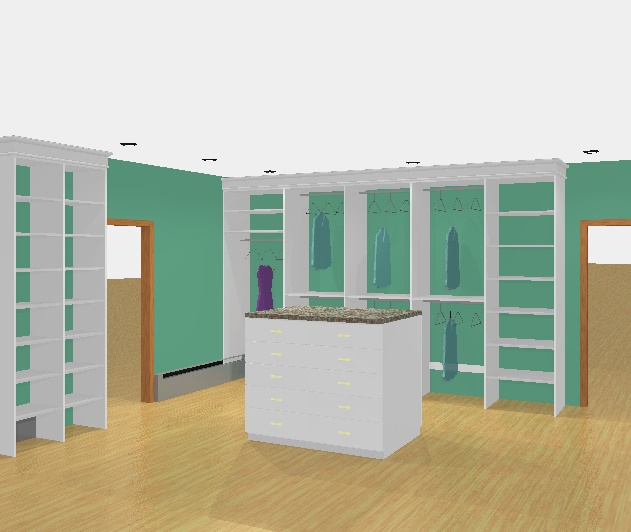
The original plan was to use cabinetry similar to that from the mudroom renovation. The possibilities were gorgeous and endless, but created a space more specific and costly than desired. After extensive internet elimination (the hours of internet searching only to eliminate possibilities, not resulting in solutions), I stumbled upon a local expert to help.
Closet Factory, a national company, with a locally owned branch sent a designer to the rescue. While the company primarily works with modern materials (melamine, etc.), their local craftsman were willing to create a solid wood alternative in order to achieve our main goal, a modern functional space with the look and feel of an original feature.
For some it’s January, but with school aged kiddos, the Fall signals the start of a new year and time for a fresh start. What began as a simple closet clean out became a construction project- less than efficient master bedroom closet be gone!
The master is divided into two almost identical sized rooms. One a bedroom, the second a “closet” or as I like to refer to it, dressing room (sounds much more 1920’s). This dressing room also serves as the pass through to the bathroom. With every project, our goal is to maintain the integrity of the home’s original craftsmanship. As such, anything we do needs to be relevant to the year of construction (evidenced by our painstaking window restoration last year). As a result, we will likely never reconfigure the space to include a spa like master bath, the existing one is redone and sufficient. So why not make the closet something fabulous?
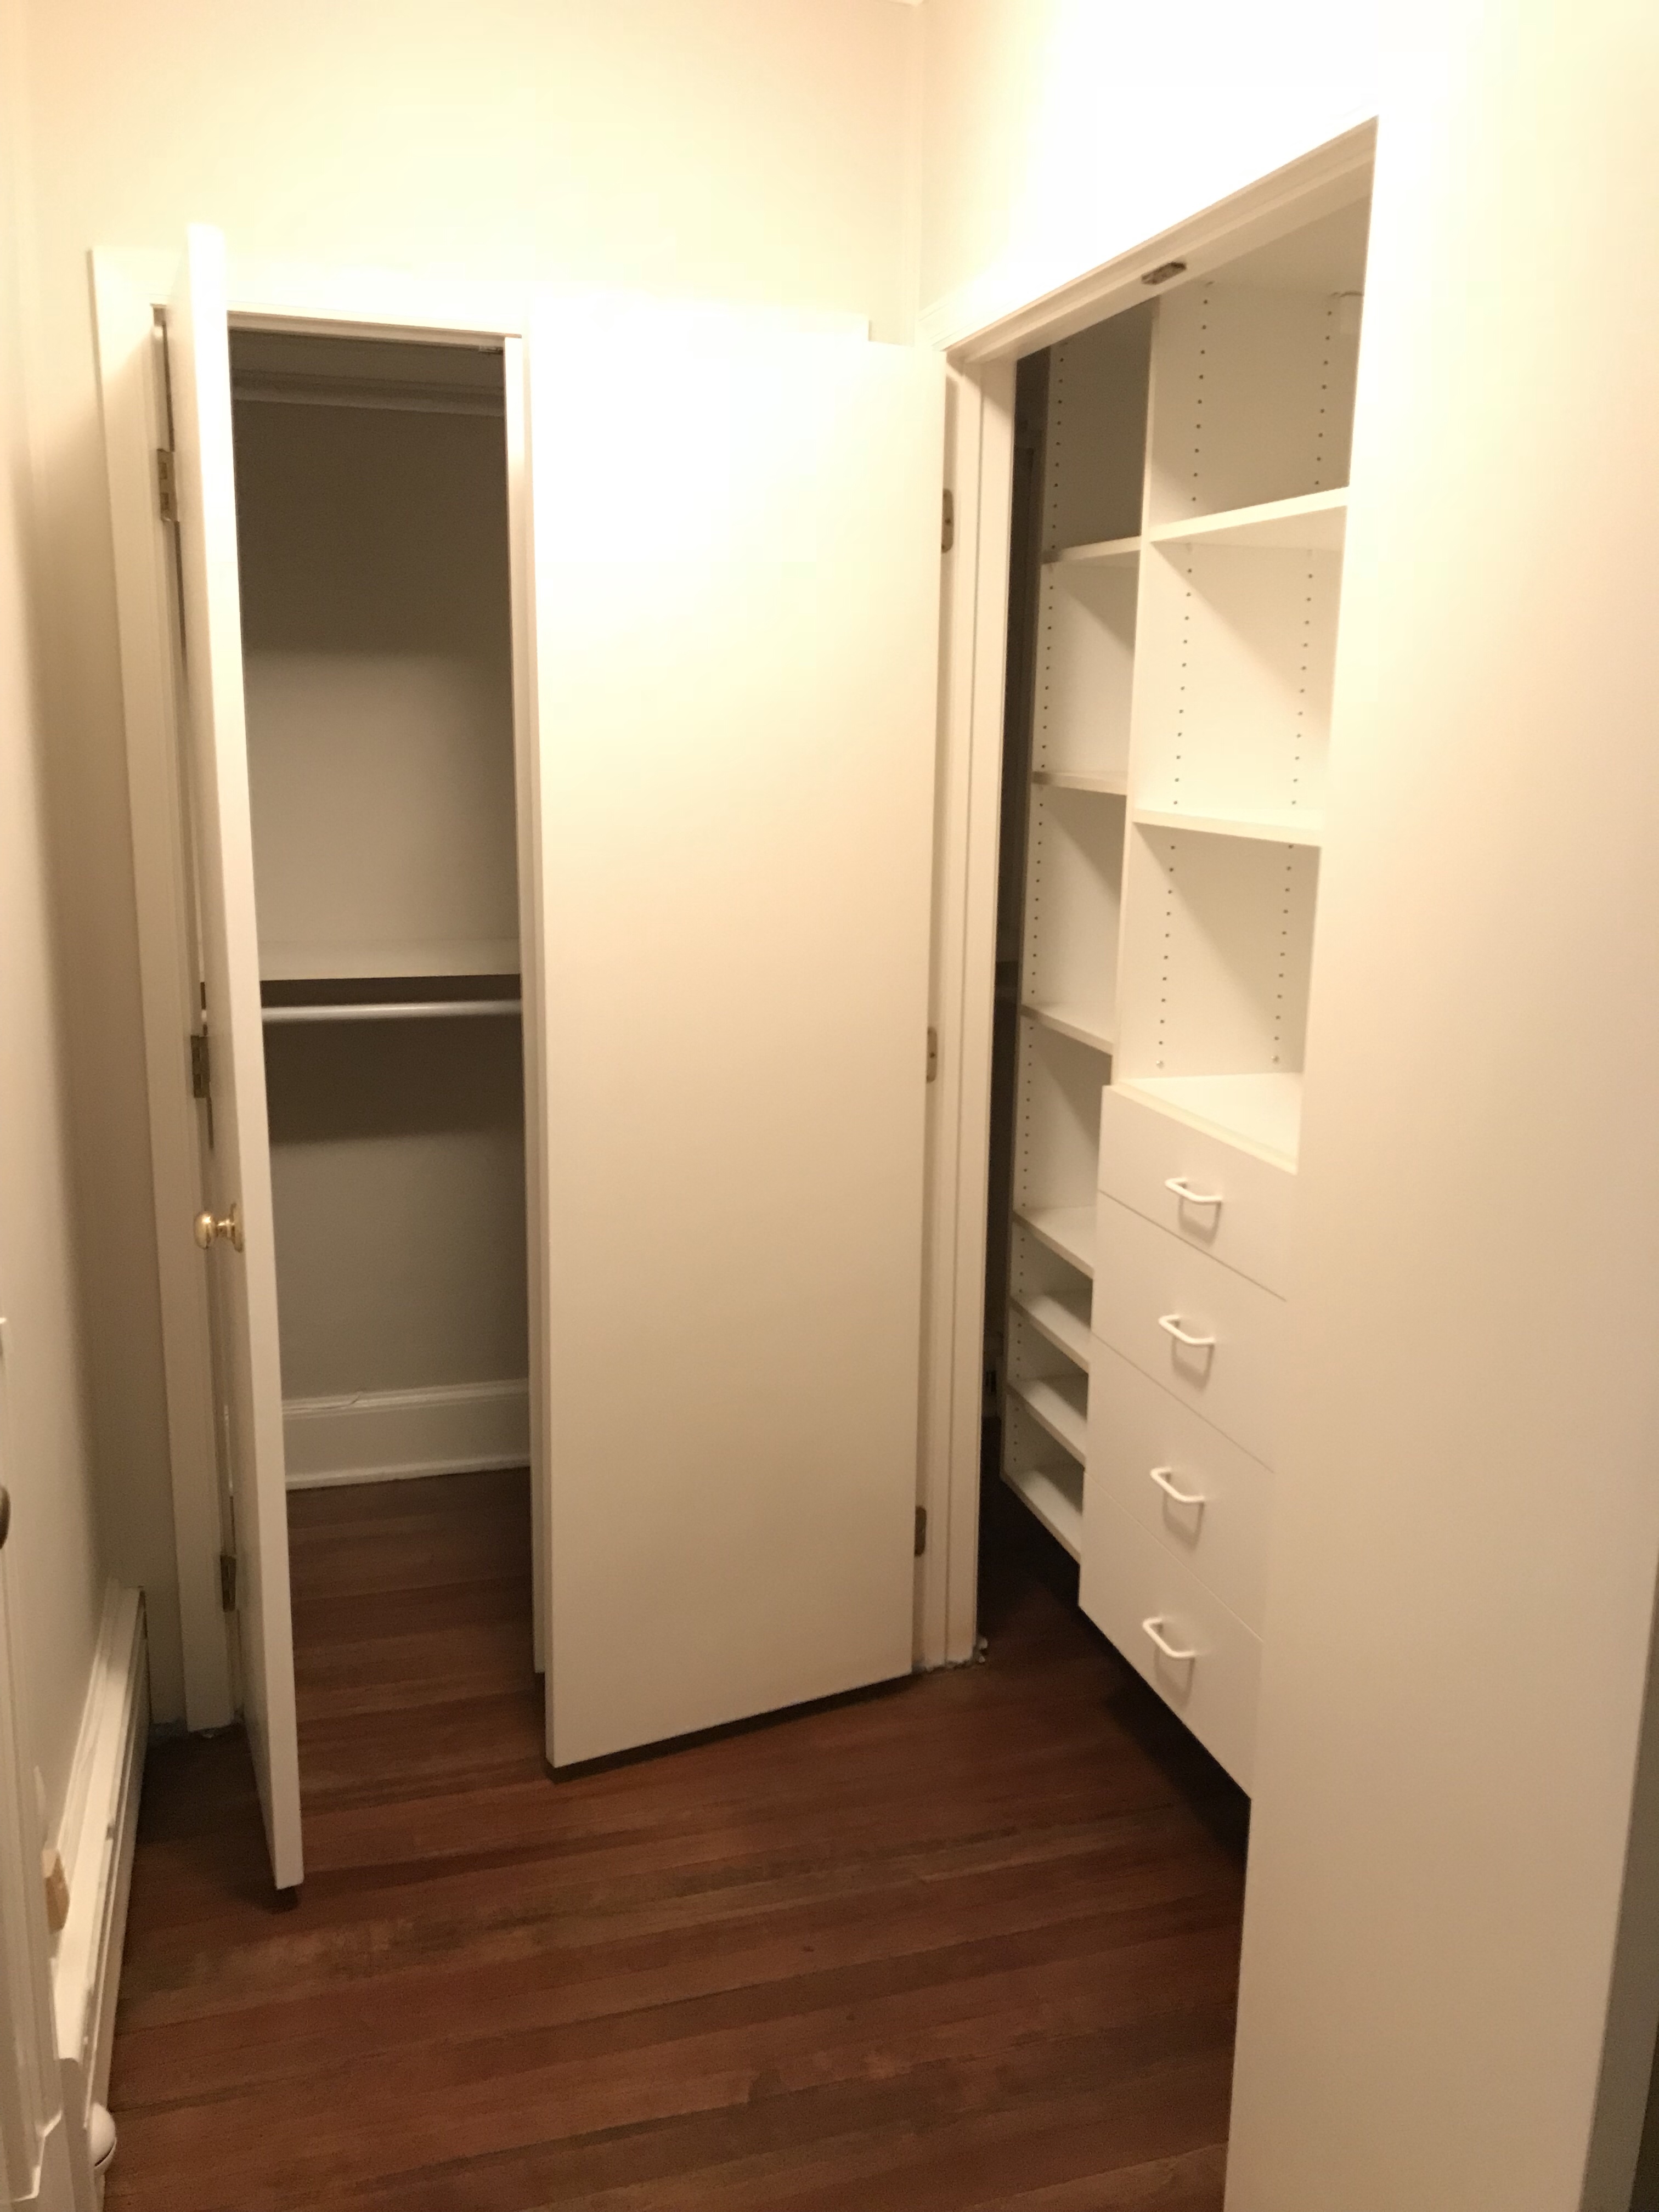
The original state.
First day closet pics. First step was carpet removal, floor refinishing and painting.
Initially we removed the mirrored closet doors, vanity and painted the space.
This weekend we emptied the space of its contents (lots and lots to donate) and kept only what we use. Then a call to our favorite contractor, and in less than one day all existing closet components and walls were removed. The result, a blank slate.
Warning- this post contains nothing pretty. The fun part comes next!
Flashback to a year ago. Time to paint the 3rd floor. Something easy to check off the list (or so we thought). After a few failed paint samples, a call to Molly Hirsch Interiors resulted in a color palette that worked beautifully for the space, and not at all the initial direction (this is why calling in the experts is always a good idea).
The crisp new color scheme now called attention to the existing wall to wall. So, a project within a project is born (there should be a word for that).
Seems every house we buy has some 20 plus year old carpeting to remove. Time to teach the kids how to cut, roll and dispose of carpeting. Or should I say show the kids how to do it and then complete the project ourselves.
Alas, the corner that led us to believe the floors were in great shape, made way to floors that needed lots of TLC. Time to refinish.